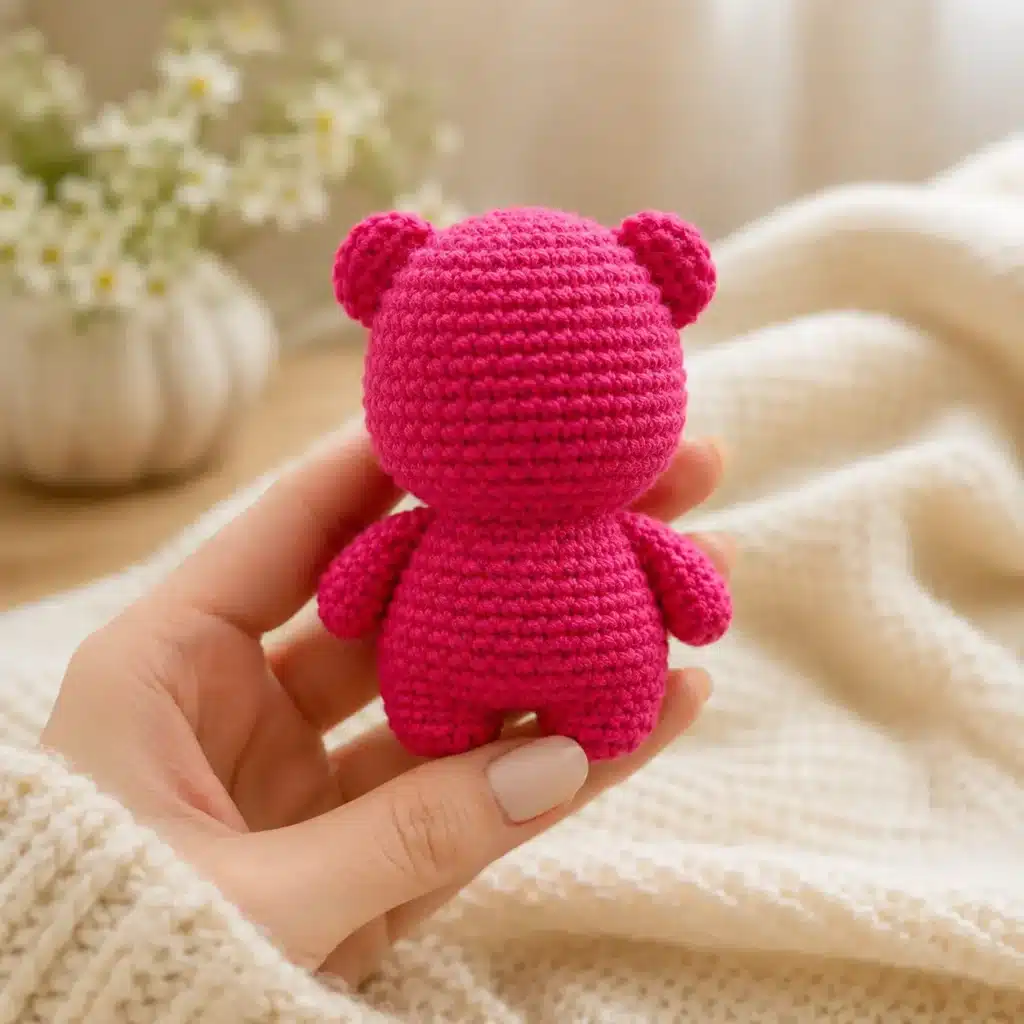
There is a specific kind of magic that happens when you pull the first loop through the yarn, transforming a pile of fibers into something with shape and potential. With the hook in hand and the pink yarn ready, the Strawberry Bear Baby begins to take form, round by round. This project is a delightful blend of fruit-inspired charm and classic amigurumi cuteness, offering a satisfying crafting experience that results in a cuddly companion for your desk or shelf.
Why This Project Works
The Strawberry Bear Baby stands out because it balances intricate details with a forgiving structure. The design features a rounded head, a soft white belly created through clever color changes, and a distinct white muzzle that gives the bear an expressive, baby-like face. It is not just a generic bear; the strawberry-pink hue combined with the white accents creates a fruity, sweet aesthetic that is perfect for spring or nursery decor. The project allows for personalization, whether you choose to keep it simple or add tiny embroidered seeds to enhance the strawberry theme. It is a project that rewards patience with a high-impact, adorable finish.
Project Overview
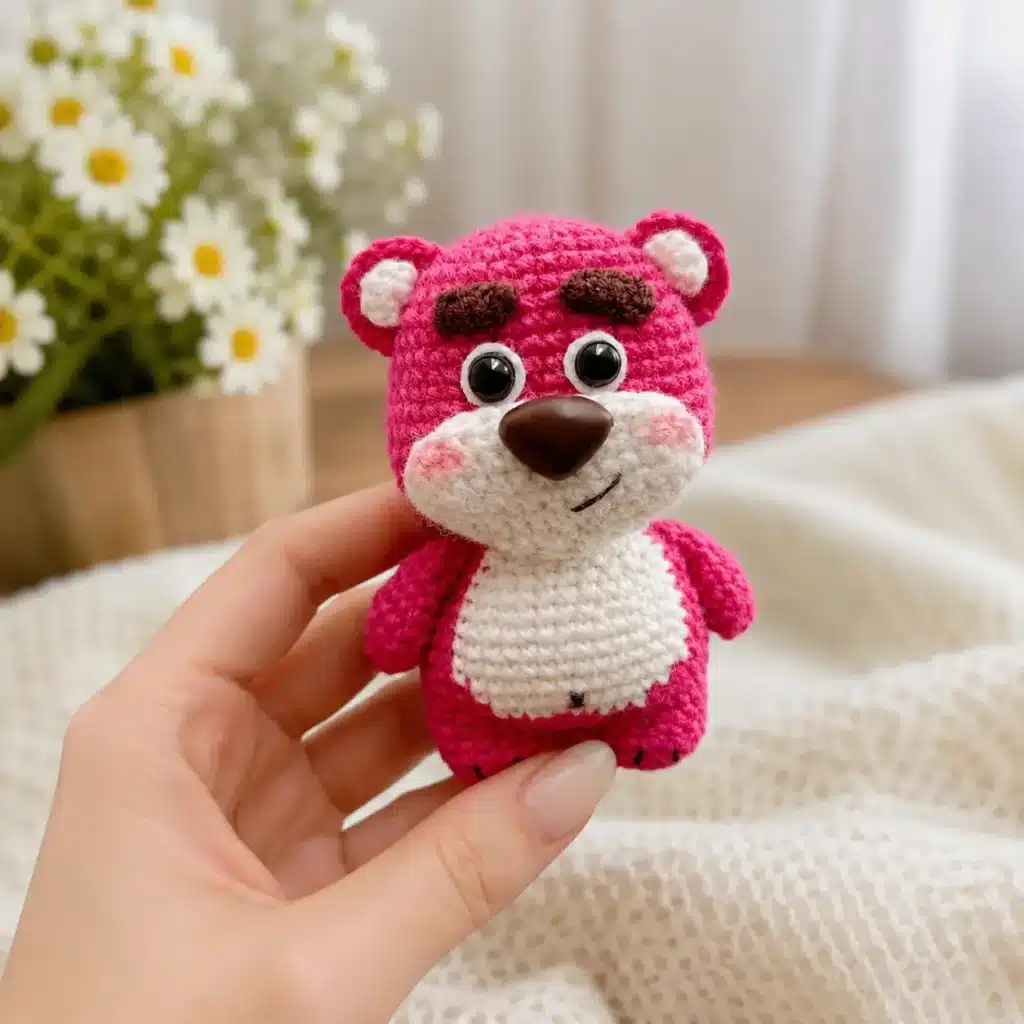
This amigurumi pattern creates a small, plush bear with a strawberry-inspired color palette. The construction involves making the head separately from the body. The body is unique because it begins with two legs joined by a chain, and the white belly is crocheted directly into the body using color changes rather than being sewn on as a separate piece. The face is defined by a white muzzle, embroidered eyebrows, and optional safety eyes or embroidered details.
Project Details
- Project Type: Amigurumi
- Skill Level: Beginner to intermediate
- Finished Size: Small amigurumi size (varies by yarn/hook). With sport-weight or 4-ply cotton yarn and a 2.0 mm to 2.5 mm hook, it is perfect as a mini plush or desk friend.
Materials
- Pink or strawberry-red yarn
- White yarn
- Dark brown yarn or embroidery thread
- Black safety eyes (optional; see baby-safe note)
- Small piece of white felt for eye whites (optional)
- Fiberfill stuffing
- Crochet hook suitable for your yarn
- Yarn needle
- Stitch marker
- Scissors
Baby-safe option: For a baby-safe version, replace safety eyes with embroidered eyes. Avoid felt pieces, glue, buttons, beads, or any removable small parts.
Abbreviations
US Crochet Terms
- MR = magic ring
- ch = chain
- sc = single crochet
- inc = increase, 2 sc in the same stitch
- dec = decrease
- hdc = half double crochet
- sl st = slip stitch
- FO = fasten off
Pattern Notes
- Work in continuous rounds unless the pattern says otherwise. Use a stitch marker to mark the first stitch of each round.
- Stuff the head and body firmly, but do not overstuff.
- The head ends with 24 stitches, and the body also ends with 24 stitches, so they can be sewn together neatly.
- The white belly is worked directly into the body using color changes. For a cleaner belly edge, carry the unused yarn inside the stitches or cut and rejoin if you prefer a neater back.
- If you need help with clean shaping, an invisible decrease tutorial is useful for this project.
Pattern Instructions
Head
Use pink yarn.
Rnd 1: 6 sc in MR. [6]
Rnd 2: inc ×6. [12]
Rnd 3: (sc, inc) ×6. [18]
Rnd 4: (sc, inc, sc) ×6. [24]
Rnd 5: (3 sc, inc) ×6. [30]
Rnd 6: (2 sc, inc, 2 sc) ×6. [36]
Rnd 7: sc around. [36]
Rnd 8: (5 sc, inc) ×6. [42]
Rnd 9–12: sc around. [42]
Rnd 13: 12 sc, (sc, inc) ×3, 6 sc, (inc, sc) ×3, 12 sc. [48]
Rnd 14–17: sc around. [48]
Rnd 18: 12 sc, (sc, dec) ×3, 6 sc, (dec, sc) ×3, 12 sc. [42]
Rnd 19: sc around. [42]
Rnd 20: (5 sc, dec) ×6. [36]
Rnd 21: (2 sc, dec, 2 sc) ×6. [30]
Rnd 22: (3 sc, dec) ×6. [24]
Stuff the head firmly.
FO, leaving a long tail for sewing.
Arms — Make 2
Use pink yarn.
Rnd 1: 6 sc in MR. [6]
Rnd 2: (sc, inc) ×3. [9]
Rnd 3: (sc, inc, sc) ×3. [12]
Rnd 4–6: sc around. [12]
Rnd 7: (sc, dec, sc) ×3. [9]
Rnd 8: sc around. [9]
Lightly stuff the bottom of the arms if needed.
FO, leaving a long tail for sewing.
You can sew the arms to the sides of the body later, or crochet them directly into the body around Rnd 17, placing one arm on each side.
Legs — Make 2
Use pink yarn.
First Leg
Rnd 1: 6 sc in MR. [6]
Rnd 2: inc ×6. [12]
Rnd 3: (3 sc, inc) ×3. [15]
Rnd 4: sc around. [15]
FO the first leg.
Second Leg
Repeat Rnd 1–4, but do not fasten off. Ch 2 and join to the first leg.
Body
Continue with pink yarn. The stitches inside brackets are worked in white yarn for the belly.
Rnd 5: 15 sc around the first leg, 2 sc across the chain, 15 sc around the second leg, 2 sc across the other side of the chain. [34]
Rnd 6: 15 sc, inc ×2, 17 sc. [36]
Rnd 7: (5 sc, inc) ×6. [42]
Start the white belly section.
Rnd 8: 15 sc, [10 sc in white], 17 sc. [42]
Rnd 9: 14 sc, [12 sc in white], 16 sc. [42]
Rnd 10: 13 sc, [14 sc in white], 15 sc. [42]
Rnd 11–13: 13 sc, [14 sc in white], 15 sc. [42]
Rnd 14: 3 sc, dec, 5 sc, dec, 1 sc, [4 sc, dec, 5 sc, dec, 1 sc in white], 4 sc, dec, 5 sc, dec, 2 sc. [36]
Rnd 15: 11 sc, [12 sc in white], 13 sc. [36]
Rnd 16: 2 sc, dec, 4 sc, dec, 1 sc, [3 sc, dec, 4 sc, dec, 1 sc in white], 3 sc, dec, 4 sc, dec, 2 sc. [30]
Rnd 17: 9 sc, [10 sc in white], 11 sc. [30]
Rnd 18: 1 sc, dec, 3 sc, dec, 1 sc, [2 sc, dec, 3 sc, dec, 1 sc in white], 2 sc, dec, 3 sc, dec, 2 sc. [24]
Stuff the body firmly.
FO, leaving a long tail for sewing the body to the head.
Ears — Make 2
Each ear has one white inner ear and one pink outer ear.
White Inner Ear — Make 2
Use white yarn.
Rnd 1: 6 sc in MR. [6]
FO. Do not join with sl st.
Pink Outer Ear — Make 2
Use pink yarn.
Rnd 1: 6 sc in MR. [6] Do not join. Ch 1 and turn.
Row 2: (sc, inc) ×3. [9]
FO, leaving a long tail for sewing.
Place the white inner ear on top of the pink outer ear. Sew or glue them together. For a baby-safe version, sew the pieces together instead of using glue.
Sew the ears to both sides of the head, around Rnd 3–5.
Eyebrows — Make 2
Use dark brown yarn.
Ch 4. Starting in the 2nd ch from hook, make 3 sc.
FO, leaving a tail for sewing.
Sew one eyebrow above each eye.
White Muzzle / Face Patch
Use white yarn.
Work around the chain.
Rnd 1: Ch 12. Starting in the 2nd ch from hook: 10 sc, 3 sc in the last ch, 9 sc on the other side of the chain, inc in the last stitch. [24]
Rnd 2: inc, 9 sc, inc ×3, 9 sc, inc ×2. [30]
Rnd 3: 2 sc, 9 hdc, 6 sc, 9 hdc, 4 sc. [30]
FO, leaving a long tail for sewing.
Sew or glue the muzzle to the front of the head, below the eyes, around Rnd 12. For the neatest result, pin the muzzle first, check the face shape, then sew it slowly around the edge.
Eyes
Insert the safety eyes between Rnd 11 and Rnd 12 of the head. Leave about 2 sc spaces between the eyes.
Optional: before attaching the safety eyes, insert each eye through a small piece of white felt, then trim the felt into a small circle to create the white eye detail.
For a baby-safe Strawberry Bear Baby, embroider the eyes instead of using safety eyes or felt.
Nose and Mouth
Use dark brown yarn or embroidery thread.
Embroider a small oval or triangle nose in the center of the white muzzle. Add a short vertical line under the nose, then a small curved mouth. Take your time with the face embroidery.
Tail
Use pink yarn.
Rnd 1: 6 sc in MR. [6]
Rnd 2: (sc, inc) ×3. [9]
Rnd 3: sc around. [9]
FO, leaving a tail for sewing.
Sew or glue the tail to the back of the body. For a stronger finish, sewing is better than glue, especially if the bear will be handled often.
Assembly
Sew the head to the body. Sew the arms to both sides of the body. Sew the ears to both sides of the head. Attach the white muzzle under the eyes. Add the safety eyes with optional white felt eye details, or embroider the eyes for a baby-safe version. Sew the eyebrows above the eyes. Embroider the nose and mouth. Sew the tail to the back of the body. Shape the bear gently with your fingers so the belly and muzzle sit nicely.
Your Strawberry Bear Baby Crochet Pattern is finished.
Pin the muzzle, ears, arms, and head before sewing. This helps you check the face position and body balance before making anything permanent.
Tips
- Keep the belly centered: When changing to white yarn for the belly, make sure the white section stays centered on the front of the body. If your stitch marker shifts slightly, do not worry. You can adjust the position when sewing the head to the body.
- Use pins before sewing: Pin the muzzle, ears, arms, and head before sewing. This helps you check the face position and body balance before making anything permanent.
- Choose the right hook size: For amigurumi, use a hook that creates tight stitches so the stuffing does not show. If your stitches look loose, go down half a hook size.
- Make it more strawberry-themed: You can add tiny embroidered white seed stitches on the pink body or head to make the bear look even more like a strawberry baby. Keep the stitches small and evenly spaced.
FAQs
Is this Strawberry Bear Baby Crochet Pattern beginner-friendly?
Yes, this pattern is beginner-friendly if you already know the basic amigurumi stitches. The body has a color-change belly, so it is a little more detailed than a very basic bear, but the shaping is simple and clear.
Can I make this bear without safety eyes?
Yes. For a baby-safe version, embroider the eyes with black or dark brown yarn. This is the best option if the bear is intended for a baby or toddler.
What yarn is best for this Strawberry Bear Baby?
Cotton or milk cotton yarn works well if you want clear stitch definition. Plush yarn can also be used for a softer bear, but the finished toy will be bigger.
Can I use glue for the muzzle, ears, and tail?
You can use glue if the bear is only for decoration, but sewing is stronger and safer. For baby items, avoid glue and sew all parts securely.
Why does the body start at Rnd 5?
The legs are Rnds 1–4. After joining the two legs with a chain, the body continues from Rnd 5.
Can I add strawberry seeds to the bear?
Yes. You can embroider small white seed stitches on the pink parts of the head or body. Keep them tiny so they do not overpower the baby bear face.
Pin This Crochet Pattern!