The Adorable Little Bear with Cherry Bib Crochet Pattern is a sweet and tiny amigurumi bear with a soft rounded head, simple little body, tiny arms, rounded ears, and the cutest cherry bib tied around the neck. This project is perfect for handmade gifts, mini nursery decorations, keychains, or a soft little desk companion. It is a lovely project when you want something small, fast, and adorable. The bear is made with basic single crochet shaping, and the bib is created separately with simple double crochet stitches, making it an accessible project for confident beginners.
Gift and Use Ideas
This little bear is more than just a toy; it is a charming handmade object that brings a touch of sweetness to any space. The cherry bib adds color and personality without making the project too complicated, making it a standout piece for a baby shower or a new parent gift. You can keep the design simple for a nursery accent, turn it into a keychain for a bag, or make a full set of pastel bears for a craft fair table. The removable bib option allows you to wash the bear easily, ensuring it stays a clean and cuddly companion for years to come.
Project Overview
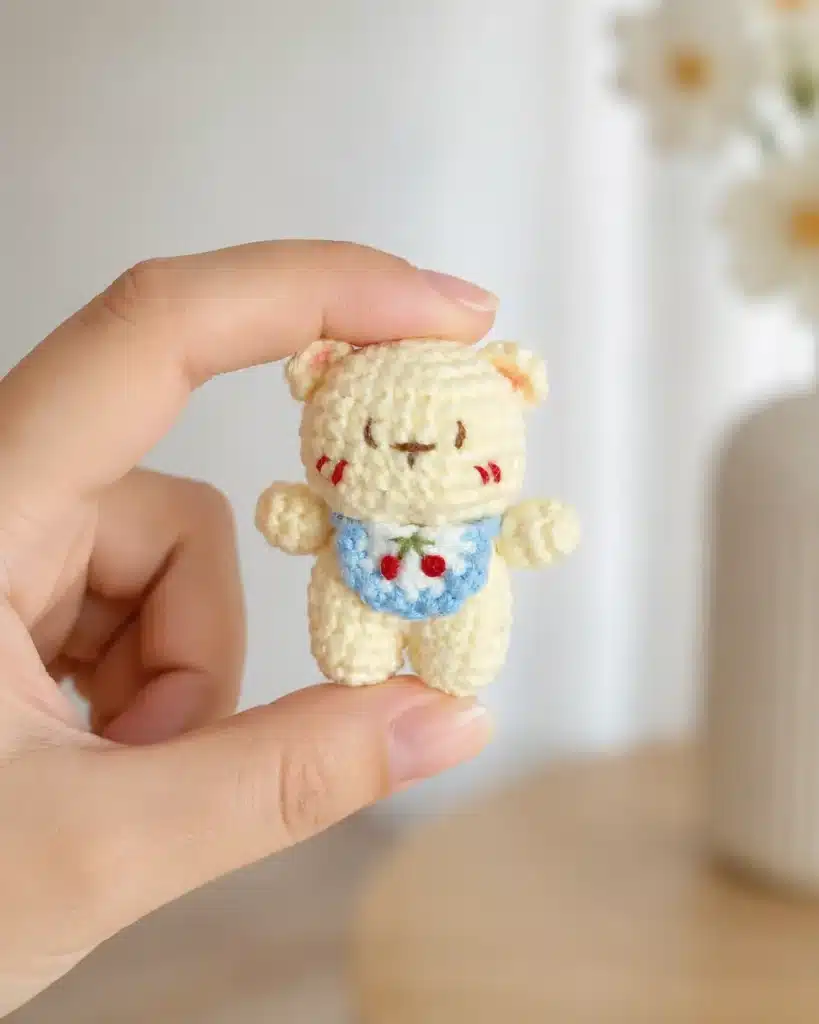
The Little Bear with Cherry Bib Crochet Pattern is a beginner-friendly amigurumi project. It features a classic teddy bear shape constructed from basic single crochet rounds, accented by a customizable bib. The construction involves creating the head, legs, body, arms, and ears separately, then assembling them. The bib is worked in the round and attached with ties, allowing for a secure fit around the bear’s neck.
Materials
- Cream or light yellow yarn for the bear
- Blue yarn for the bib edge
- White yarn for the bib center
- Red yarn or thread for the cherries
- Green or dark thread for the cherry stems, optional
- Dark brown or black embroidery thread for the face
- Small amount of red or pink thread for cheeks
- Fiberfill stuffing
- Crochet hook suitable for your yarn
- Yarn needle
- Stitch marker
- Scissors
Gauge and Finished Size
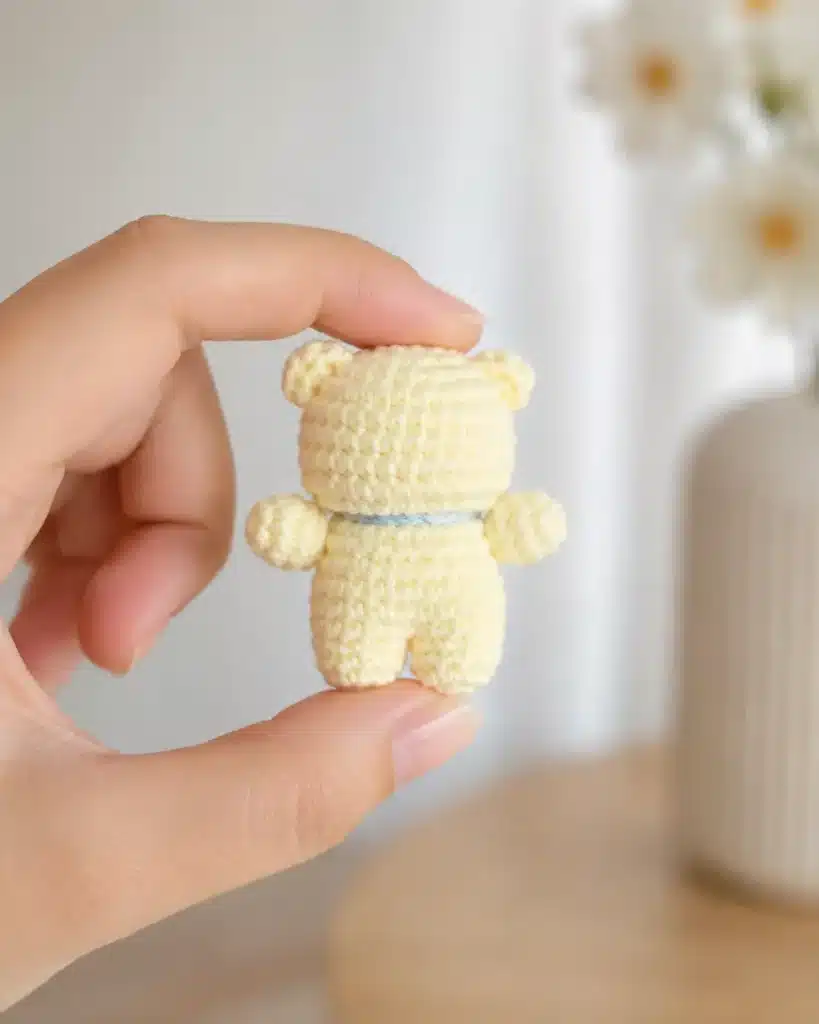
The finished size depends on your yarn, hook size, and tension. With sport-weight cotton yarn and a 2.0 mm hook, the bear will usually be a small amigurumi size, perfect for a mini gift or keychain.
Skill Level
Beginner to easy intermediate. You should be comfortable with:
- Magic ring
- Single crochet
- Increases and decreases
- Working in continuous rounds
- Basic sewing
- Simple embroidery
For extra stitch help, you can check this helpful guide on how to single crochet before starting.
Abbreviations — US Crochet Terms
- MR = magic ring
- ch = chain
- sc = single crochet
- inc = increase, 2 sc in the same stitch
- dec = decrease
- dc = double crochet
- sl st = slip stitch
- FO = fasten off
For a general reference on standard crochet abbreviations, you can also visit the Craft Yarn Council crochet abbreviations guide.
Pattern Notes
Work in continuous rounds unless the pattern says otherwise. Use a stitch marker to mark the first stitch of each round. Stuff the head firmly, but do not overstuff the body. Keep the stitches tight so the stuffing does not show through. The bib is made separately and tied or sewn around the bear’s neck.
When making small amigurumi toys, neat decreases can make a big difference. If your decreases leave holes, this invisible decrease crochet tutorial can help you get a cleaner finish.
Pattern Instructions
Head
Use cream or light yellow yarn.
- Rnd 1: 6 sc in MR. [6]
- Rnd 2: inc ×6. [12]
- Rnd 3: (sc, inc) ×6. [18]
- Rnd 4: (2 sc, inc) ×6. [24]
- Rnd 5: (3 sc, inc) ×6. [30]
- Rnd 6–8: sc around. [30]
- Rnd 9: 8 sc, inc, 1 sc, inc, 9 sc, inc, 1 sc, inc, 7 sc. [34]
- Rnd 10: sc around. [34]
- Rnd 11: 2 sc, (sc, dec) ×5, 2 sc, (sc, dec) ×5. [24]
- Rnd 12: (2 sc, dec) ×6. [18]
Stuff the head firmly. FO and leave a long tail for sewing.
Legs and Body
Use cream or light yellow yarn.
Leg 1
- Rnd 1: 5 sc in MR. [5]
- Rnd 2: inc ×5. [10]
- Rnd 3–4: sc around. [10]
FO the first leg.
Leg 2
Repeat Rnd 1–4, but do not fasten off.
Place the two legs together. Join the second leg to the first leg with a sl st or by crocheting directly into the first leg. Ch 1 if needed. The ch 1 does not count as a stitch.
Now continue crocheting around both legs to form the body.
- Rnd 5: (4 sc, inc) ×4. [24]
- Rnd 6–8: sc around. [24]
- Rnd 9: (2 sc, dec) ×6. [18]
- Rnd 10: sc around. [18]
Stuff the legs and body firmly but not too hard. FO and leave a long tail for sewing the body to the head.
Arms
Make 2. Use cream or light yellow yarn.
- Rnd 1: 6 sc in MR. [6]
- Rnd 2: (2 sc, inc) ×2. [8]
- Rnd 3: sc around. [8]
- Rnd 4: 2 sc, dec ×2, 2 sc. [6]
Lightly stuff if needed. FO and leave a tail for sewing.
Ears
Make 2. Use cream or light yellow yarn.
- Rnd 1: 4 sc in MR. [4] Do not join. Pull the magic ring tight. Ch 1, turn.
- Row 2: 4 sc across. [4]
FO and leave a tail for sewing.
Cherry Bib
The bib is the sweetest part of this Little Bear with Cherry Bib Crochet Pattern. It is small, simple, and easy to customize.
White Bib Center
Use white yarn.
In MR: ch 2, 6 dc into the ring. Ch 1, FO, and pull the magic ring tight. This makes a small half-circle bib base.
Blue Bib Edge and Ties
Use blue yarn.
Leave about 10 cm / 4 inches of yarn tail at the beginning. Ch 15 for the first tie. Attach the chain to the first stitch of the white bib. Work across the white bib like this: Ch 2, sl st into the next stitch. Repeat this across the bib until you reach the last stitch. After the last stitch, ch 15 for the second tie. Leave about 10 cm / 4 inches of yarn tail and FO.
Use red yarn to embroider two small cherries on the bib. Use green or dark thread for the cherry stem if desired.
For a more playful look, you can use the same color-change idea from small decorative amigurumi projects like this mini butter bear crochet pattern.
Face Details
Use dark brown or black embroidery thread for the eyes, nose, and mouth.
Embroider two small eyes on the front of the head. Add a tiny nose between the eyes. Stitch a small mouth under the nose. Add small red or pink cheek stitches on both sides of the face.
Keep the face simple and soft. A tiny bear like this looks best with minimal embroidery.
Assembly
Sew the body to the head. Sew the arms to both sides of the body. Sew the ears to the top sides of the head. Tie or sew the bib around the bear’s neck. Embroider the eyes, nose, mouth, and cheek details.
Before sewing everything permanently, pin the pieces in place first. This helps you check the balance of the ears, arms, and bib.
If you enjoy tiny animal designs, you may also like the soft handmade style of this brown calf crochet pattern or this cute zodiac cow crochet pattern.
Tips
- Use a smaller hook than your yarn label recommends for tighter amigurumi stitches.
- Stuff the head more firmly than the body so it keeps its shape.
- Do not overstuff the arms because they should stay small and soft.
- Use sewing pins before attaching the ears and arms.
- Embroider the face slowly and check both sides often.
- Hide all yarn tails carefully inside the bear.
If you want to improve clean color transitions for future bibs and outfit details, this guide on changing colors in amigurumi is very useful.
FAQ About Little Bear with Cherry Bib Crochet Pattern
Is this Little Bear with Cherry Bib Crochet Pattern beginner-friendly?
Yes. This pattern is beginner-friendly if you already know how to crochet in rounds, increase, decrease, sew pieces together, and embroider simple face details.
Can I use plush yarn for this bear?
Yes, but the bear will become larger. If you use plush or chenille yarn, use a hook size that keeps your stitches tight and adjust the safety or embroidered face size.
Can I make the bib removable?
Yes. You can leave the two blue ties long enough to tie around the neck instead of sewing the bib permanently.
Can I turn this bear into a keychain?
Yes. Add a keychain ring to the top of the head after assembly. Make sure it is sewn securely if the bear will be used on a bag or keys.
Can I change the cherries on the bib?
Of course. You can embroider strawberries, hearts, flowers, stars, or tiny dots instead of cherries. The bib is easy to customize.
Pin This Crochet Pattern!