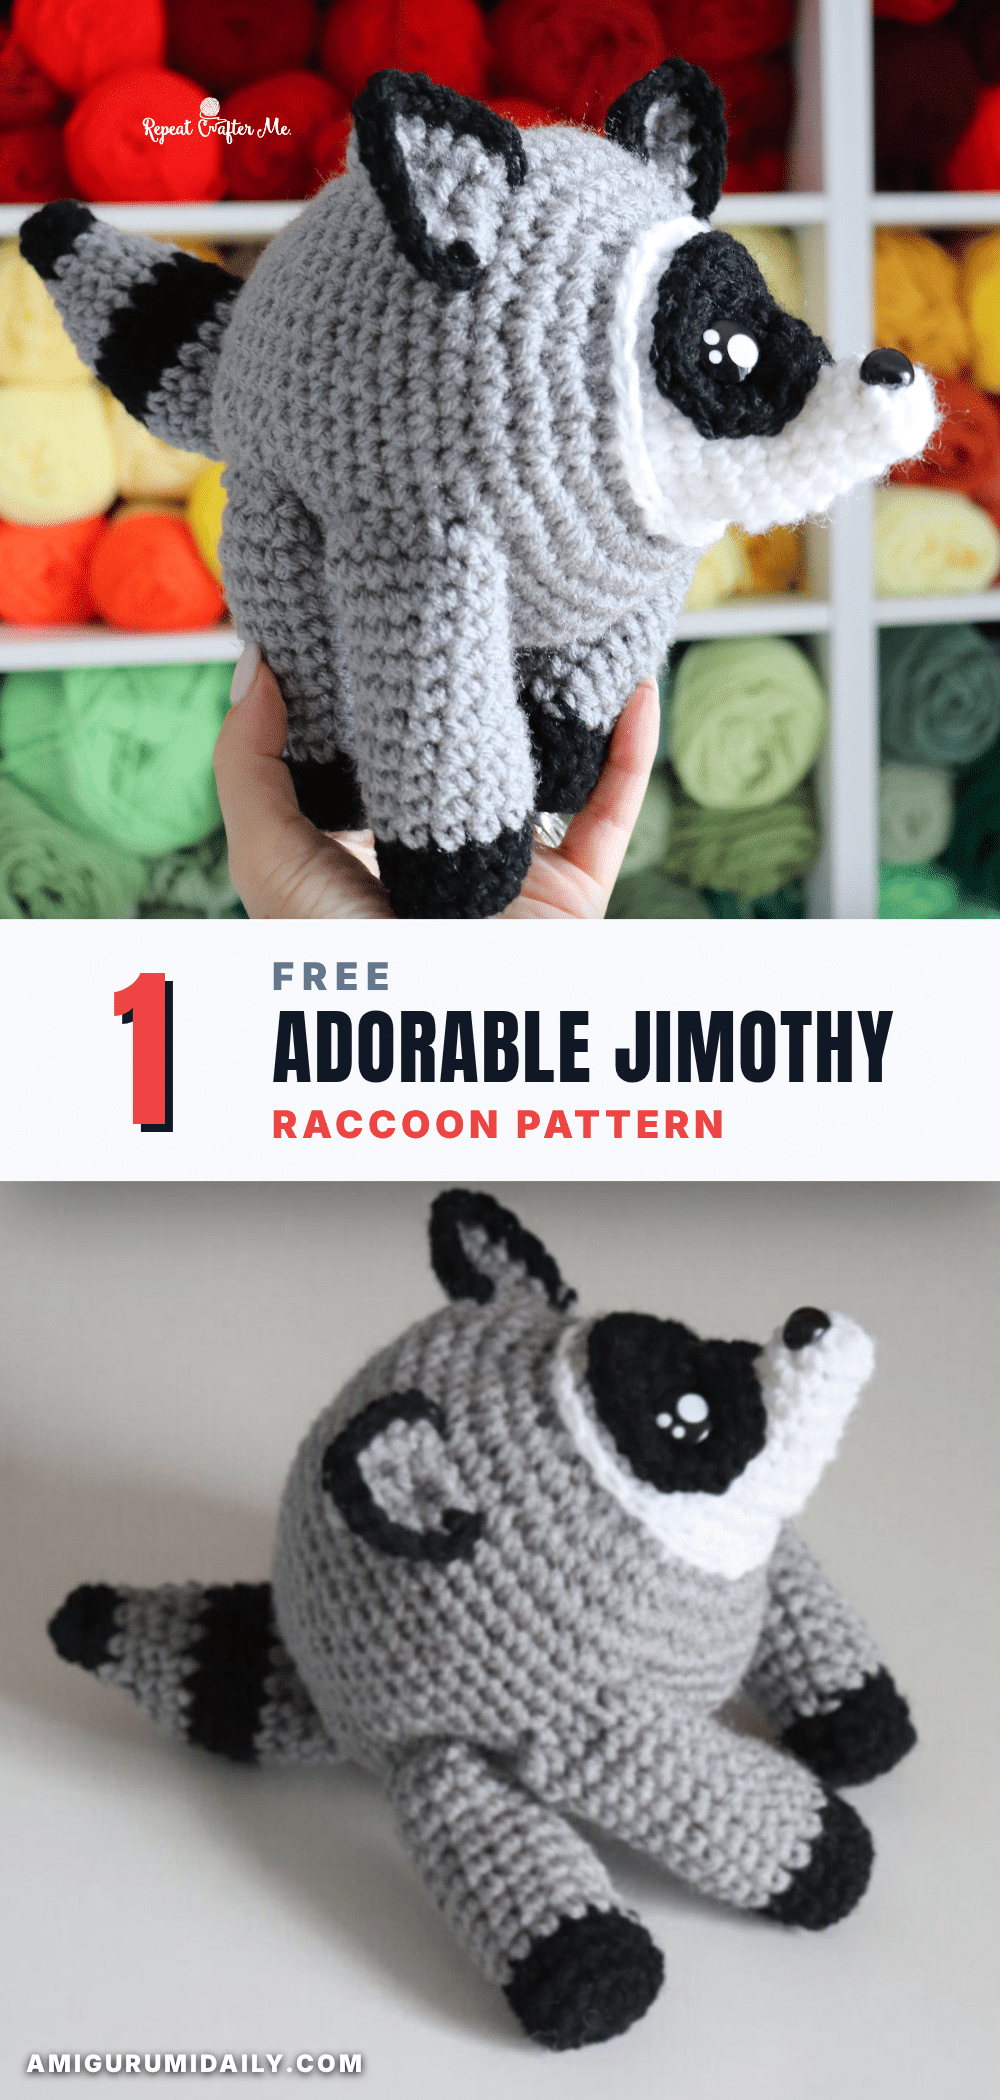
There is something deeply satisfying about the quiet rhythm of amigurumi. A cozy evening, a small batch of yarn, and the repetitive, meditative motion of counting stitches can turn a busy day into a moment of peace. As you work through the rounds, watching a simple circle transform into a recognizable character, you are not just making a toy; you are crafting a small piece of joy. This project, inspired by the viral Seattle raccoon Jimothy, is the perfect companion for that ritual. With his unique body shape and signature mask, he is a delightful challenge that rewards patience with an incredibly expressive result.
Small Details That Make It Better
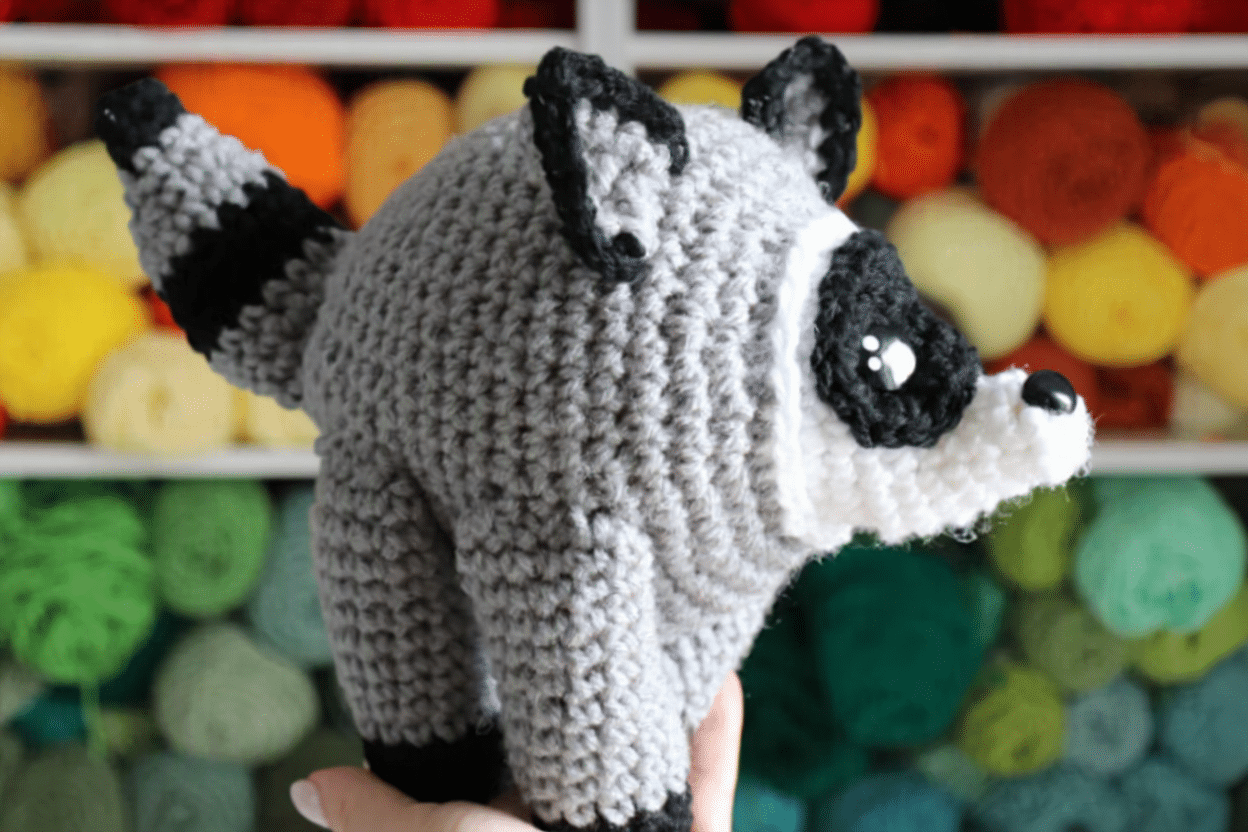
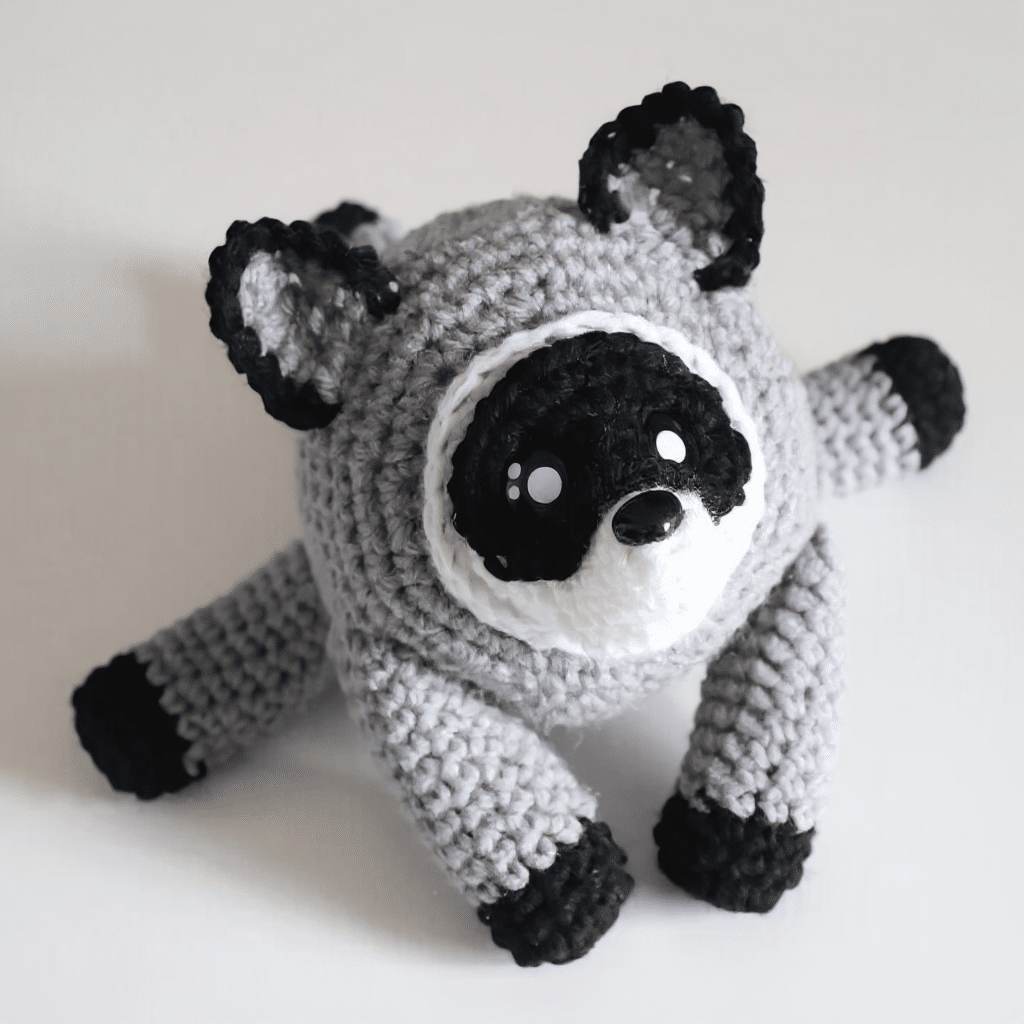
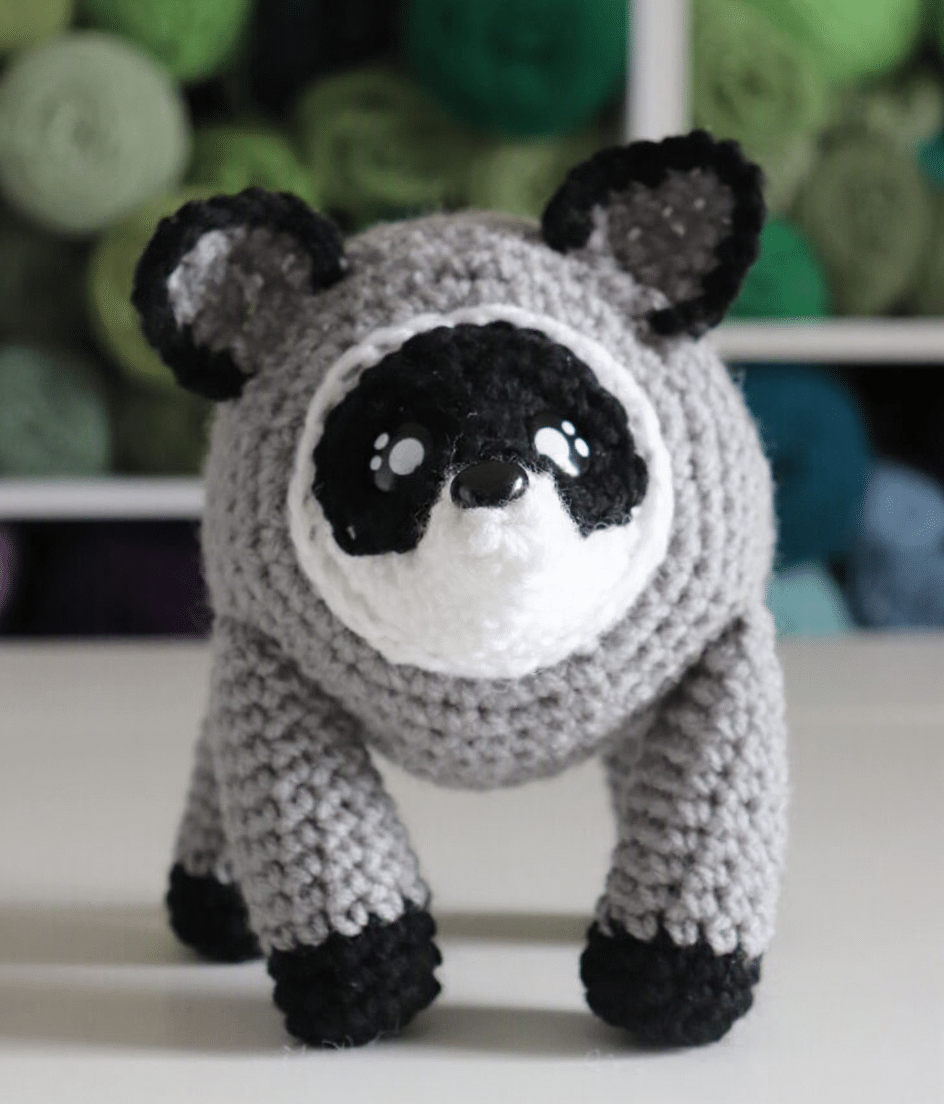
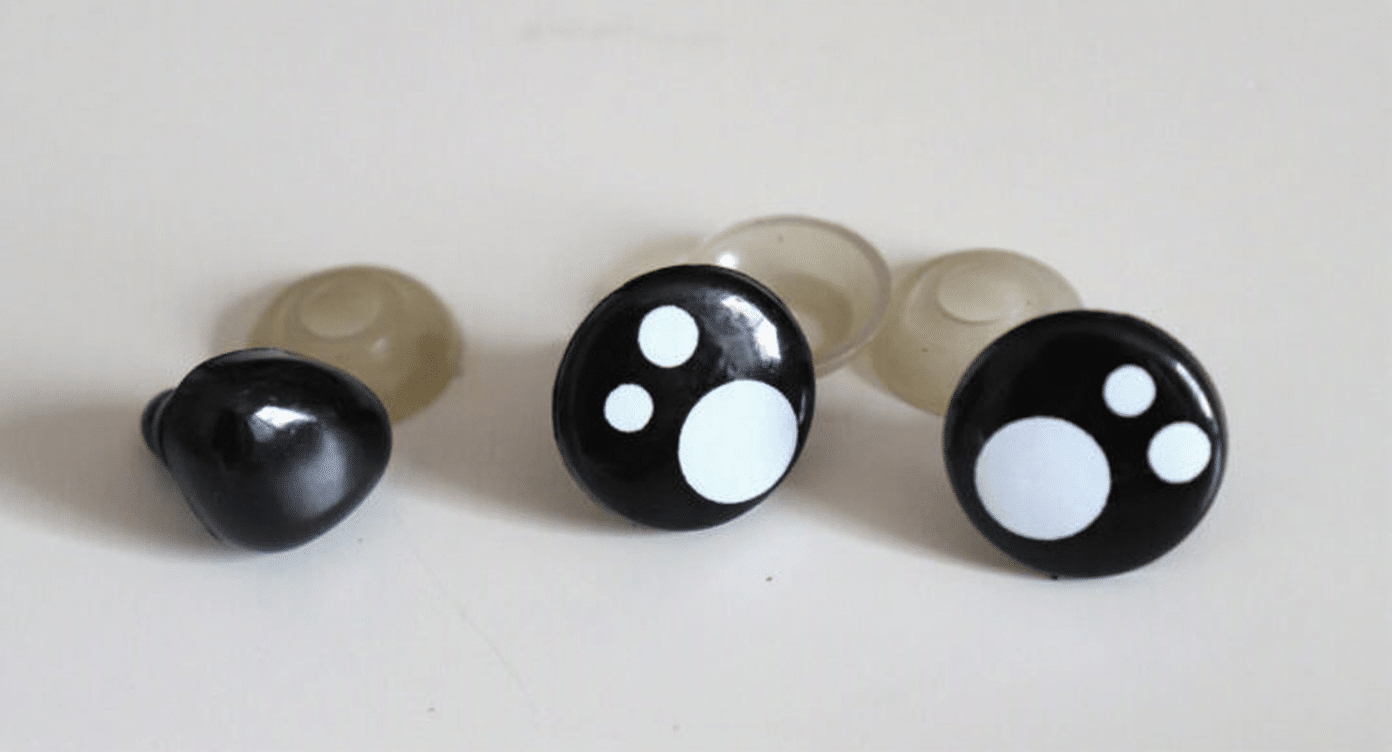
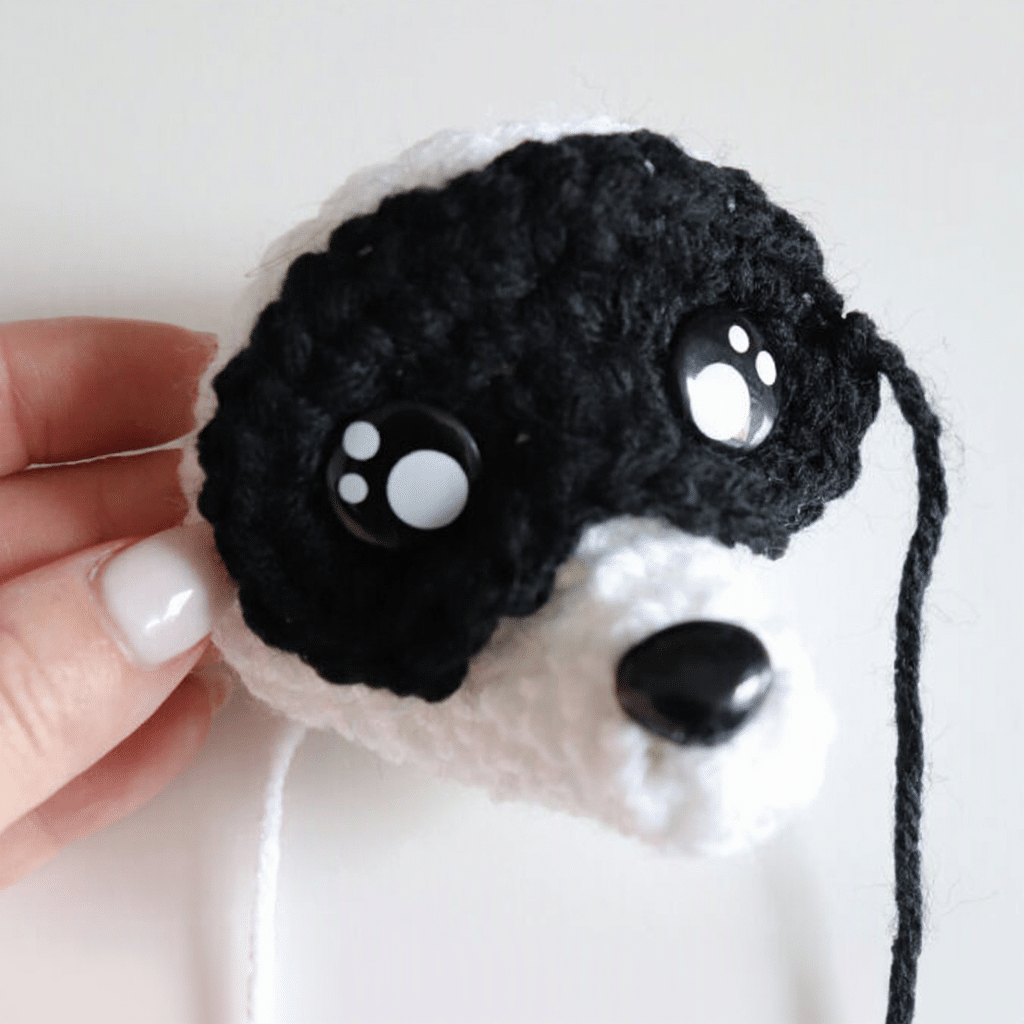
What truly elevates Jimothy from a standard raccoon pattern to a character piece is the attention to facial expression. The source pattern highlights the use of “kawaii” safety eyes, which feature painted white highlights. Because Jimothy wears a distinct black mask, standard black eyes might disappear into the yarn. These highlighted eyes ensure his gaze remains bright and engaging, adding a sparkle that brings his personality to life. Additionally, the construction of the ears—sewn only at the base—allows them to stand up naturally, giving him an alert and curious posture. The short legs, a nod to his real-life inspiration, require careful spacing during assembly to ensure he stands upright, making the final positioning step a crucial part of his charm.
Project Overview
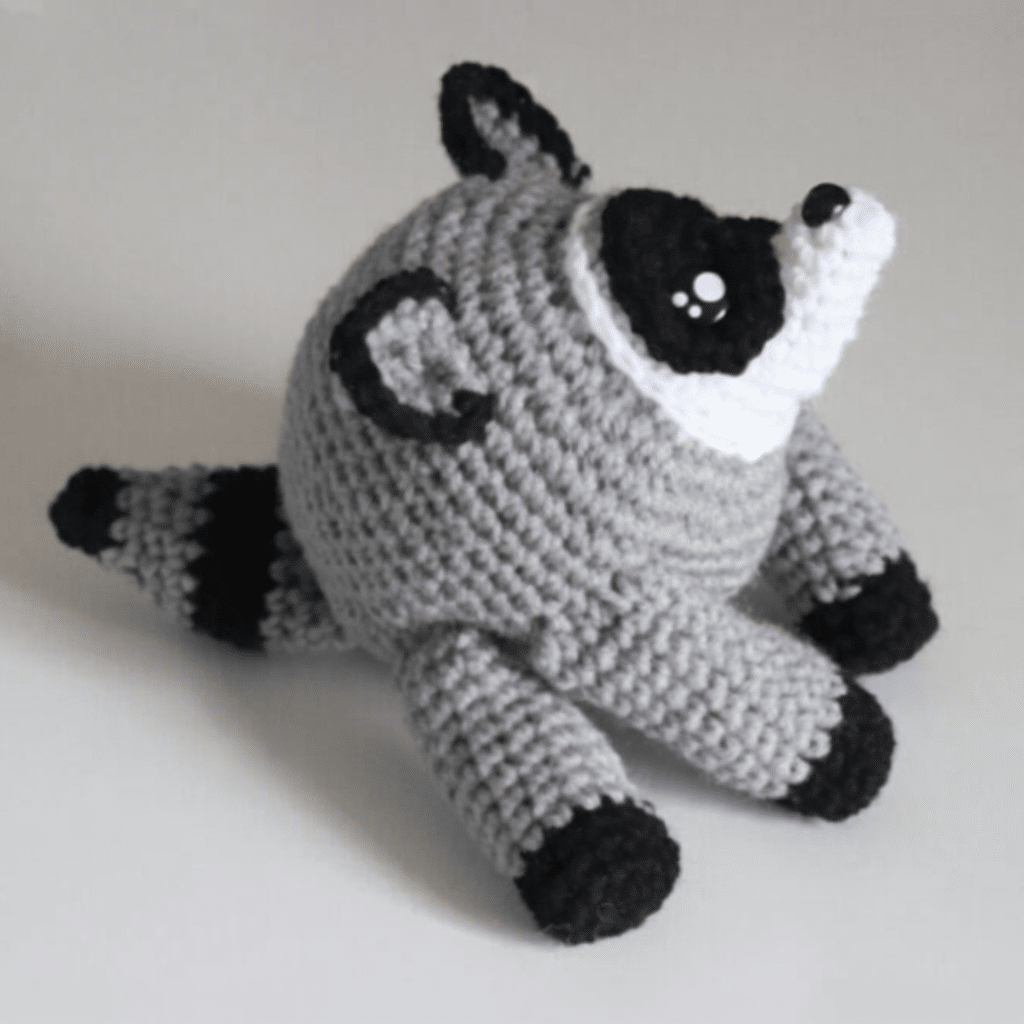
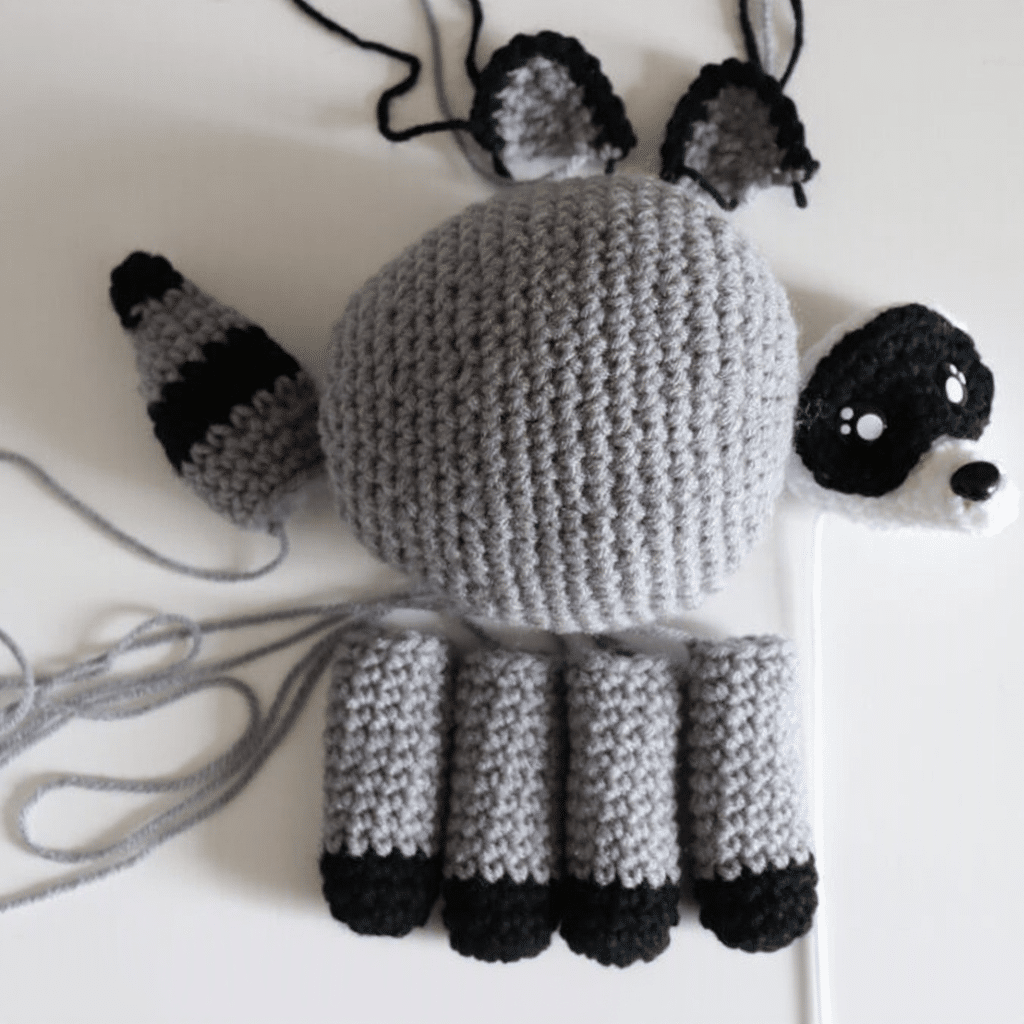
This pattern creates an amigurumi version of Jimothy, the beloved raccoon from Seattle. The project involves crocheting several distinct components—the body, snout, eye patch, ears, tail, and legs—and assembling them to capture his unique silhouette. The pattern utilizes basic crochet stitches with color changes to create the raccoon’s signature markings. It is suitable for crocheters who are comfortable with working in the round, changing colors, and sewing parts together.
Materials
- Yarn: Red Heart Super Saver in Dusty Gray, Black, and White. Shop colors on Yarnspirations.com.
- Crochet Hook: Size H (5.0 mm).
- Stuffing: Polyfil Fiberfill.
- Tools: Tapestry Needle.
- Safety Eyes: Kawaii Safety Eyes (approx. 14 mm). Shop Kawaii Safety Eyes on Amazon or use a Kawaii Safety Eyes Multi-pack for sizing variety.
- Safety Nose: Black Safety Nose (approx. 15 mm). Shop Safety Noses on Amazon.
Gauge and Finished Size
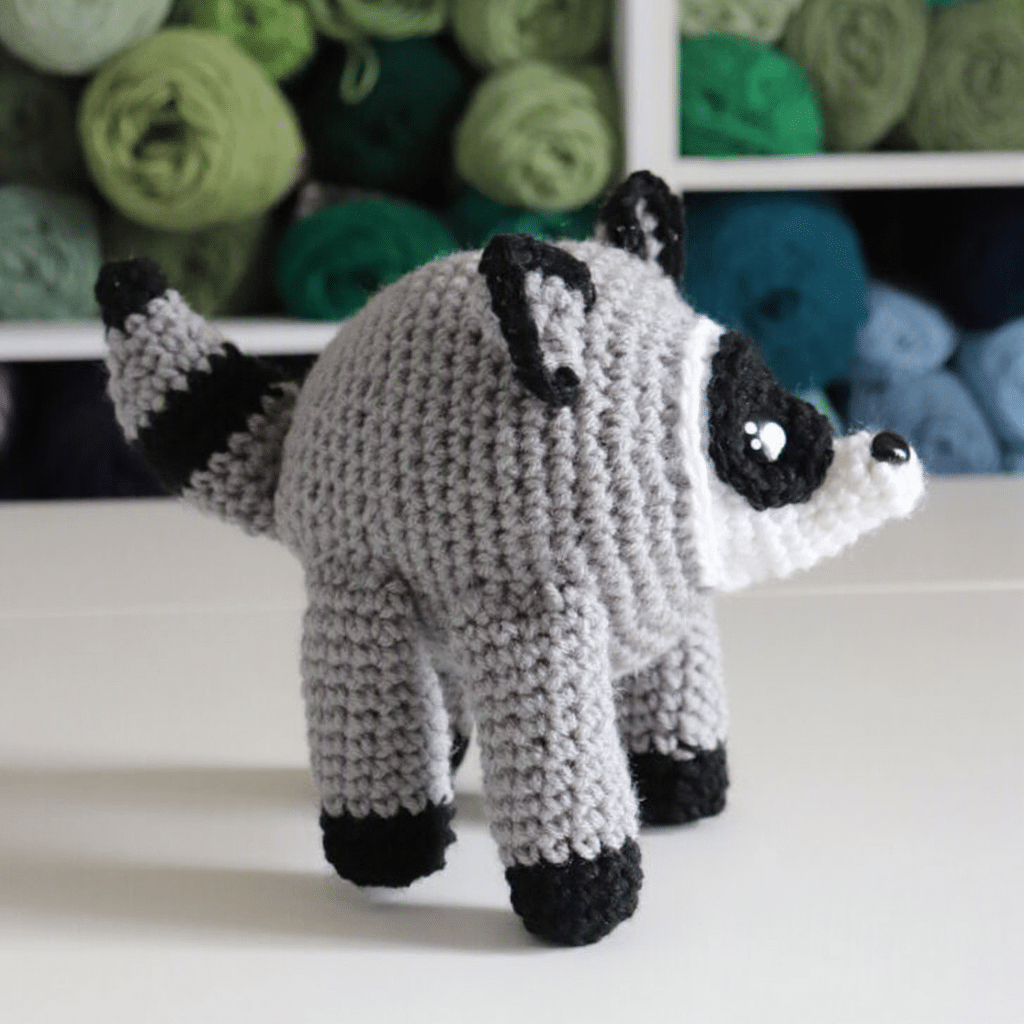
Finished Size: Approximately 10 inches wide (from tail to nose) x 7 inches tall (from ears to bottom of feet).
Gauge: Specific gauge is not provided. Ensure your tension is consistent to match the stitch counts.
Abbreviations
- SC: Single Crochet
- HDC: Half Double Crochet
- DC: Double Crochet
- SC Decrease: Single Crochet Decrease (2 SC in next 2 stitches)
- MC: Magic Ring
- Ch: Chain
- Slip Stitch: Slip Stitch
- Turn: Turn work
Pattern Notes
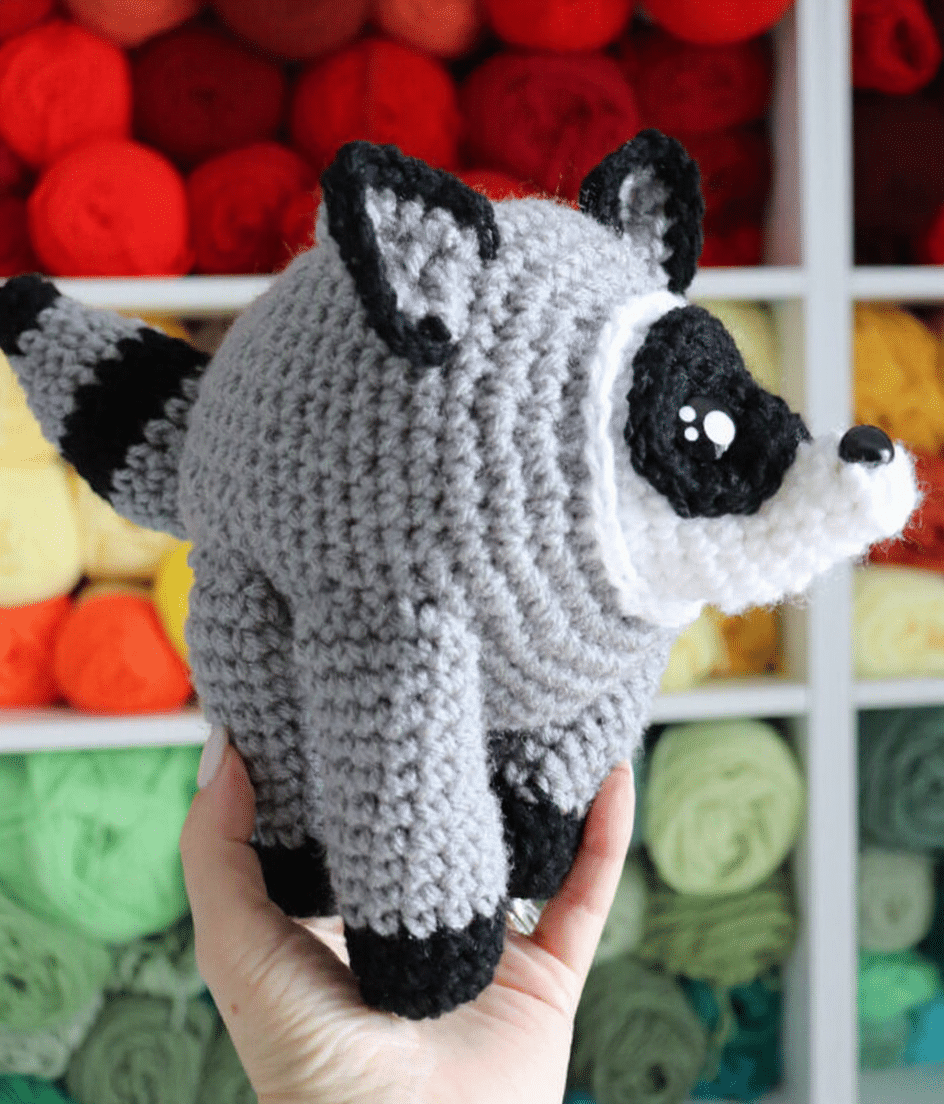
Safety Eyes & Nose Sizing: The pattern recommends approximately 14 mm kawaii safety eyes and a 15 mm safety nose. The kawaii eyes often come in variety packs without labeled sizes. It is recommended to hold a few pairs up to the black eye patch before attaching the backs to choose the size you prefer. Anything in the 12–16 mm range will look great. The 15 mm nose is usually labeled in variety packs and fits the face well.
Pattern Instructions
Body (Make 1)
With gray yarn:
- Magic Ring: Chain 1 and make 10 SC in ring, join, chain 1.
- Round 2: 2 SC in each stitch around, join, chain 1 (20 SC).
- Round 3: 2 SC in first, SC in next, repeat around, join, chain 1 (30 SC).
- Round 4: SC in each stitch around, join, chain 1 (30 SC).
- Round 5: 2 SC in first, SC in next 2, repeat around, join, chain 1 (40 SC).
- Round 6: 2 SC in first, SC in next 3, repeat around, join, chain 1 (50 SC).
- Rounds 7-15: SC in each stitch around, join, chain 1 (50 SC).
- Round 16: SC Decrease, SC in next 3, repeat around, join, chain 1 (40 SC).
- Rounds 17-18: SC in each stitch around, join, chain 1 (40 SC).
- Round 19: SC Decrease, SC in next 2, repeat around, join, chain 1 (30 SC).
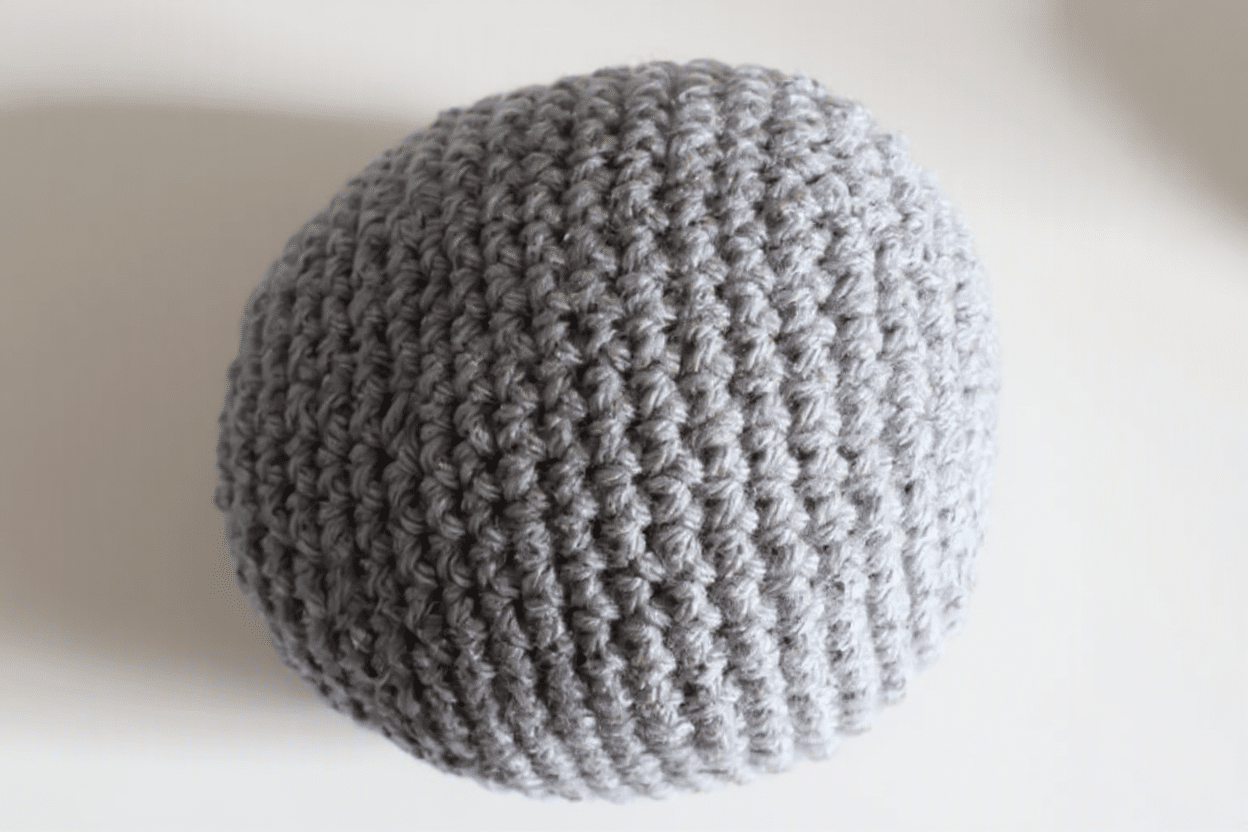
- Rounds 20-22: SC in each stitch around, join, chain 1 (30 SC). Start stuffing with polyfil and continue to stuff until closed.
- Round 23: SC Decrease, SC in next, repeat around, join, chain 1 (20 SC).
- Round 24: SC Decrease around (10 SC). Fasten off leaving a long tail. Thread the tail through the remaining 10 stitches and pull tight to close. Set body aside until assembly.
Eye Patch (Make 1)
With black yarn:
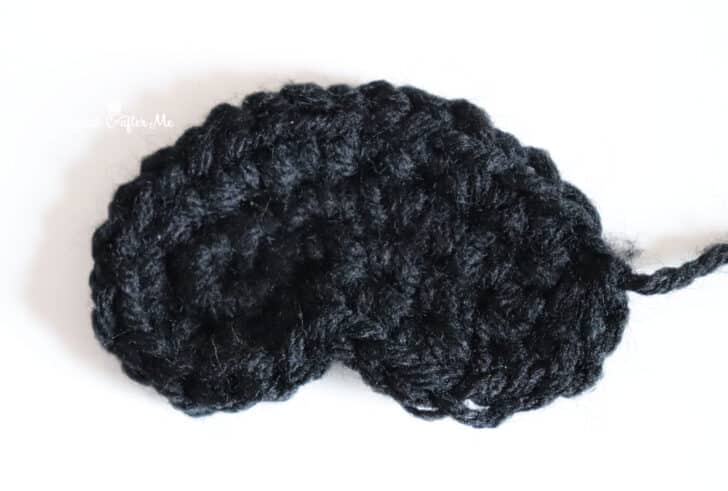
- Foundation: Chain 8. SC in 3rd chain from hook, SC in next 4 chains, 4 SC in last chain. Working on opposite side of foundation chain, SC in next 4 chains, 3 SC in last chain, join with slip stitch, chain 1 (16 SC).
- Round 2: 2 SC in each stitch around, except make only 1 SC in each of the two stitches that form the inside curve. Join with slip stitch (30 SC). Fasten off leaving a long tail for sewing.
Snout (Make 1)
With white yarn:
- Magic Ring: Chain 1 and make 6 SC in ring, join, chain 1.
- Round 2: SC in each stitch around, join, chain 1 (6 SC).
- Round 3: 2 SC in first, SC in next 2, repeat around, join, chain 1 (8 SC).
- Round 4: SC in each stitch around, join, chain 1 (8 SC).
- Round 5: 2 SC in first, SC in next 3, repeat around, join, chain 1 (10 SC).
- Round 6: 2 SC in first, SC in next 4, repeat around, join, chain 1 (12 SC).
- Round 7: SC in first 4, 2 SC in next 6, SC in last 2, join, chain 1 (18 SC).
- Round 8: SC in first 6, 2 SC in next 6, SC in last 6, join, chain 1 (24 SC).
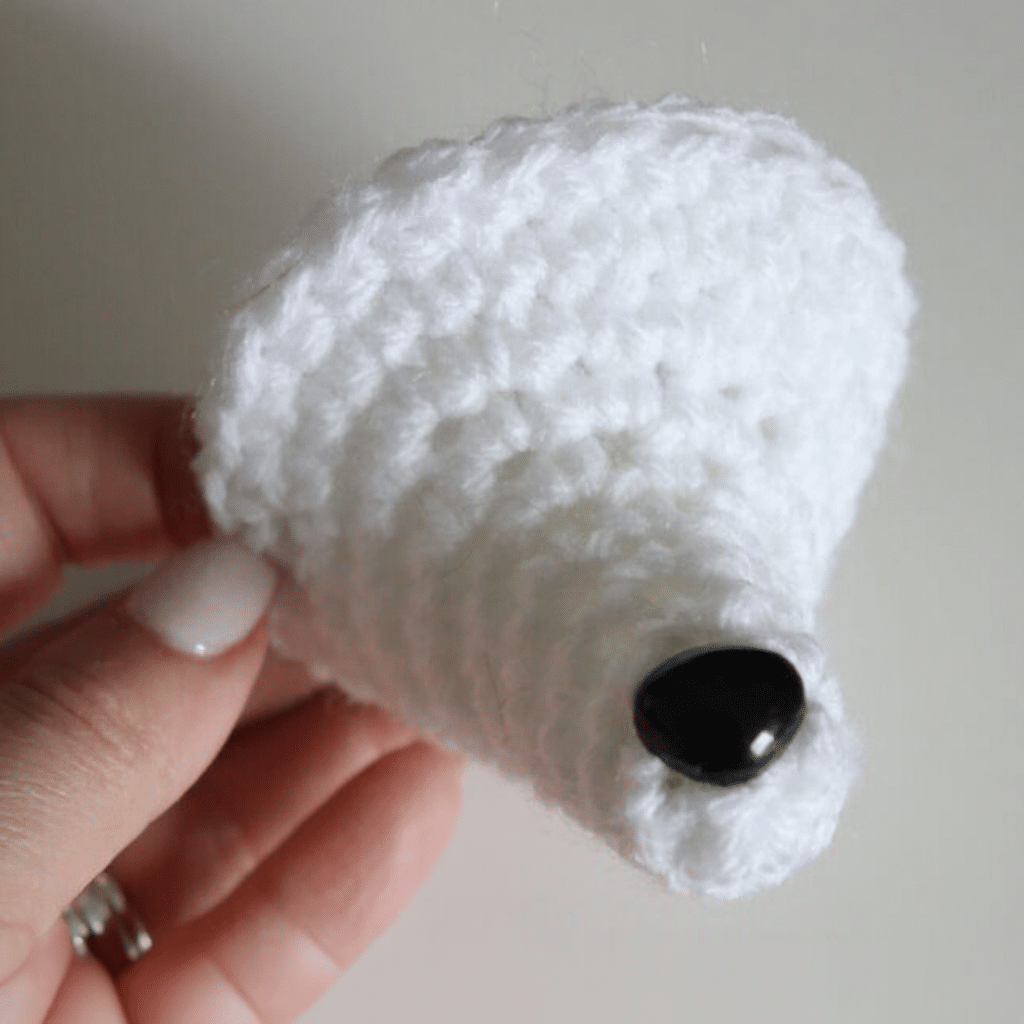
- Rounds 9-10: SC in each stitch around, join, chain 1 (24 SC). Fasten off leaving long tail. Place Safety Nose at tip. Set aside until assembly.
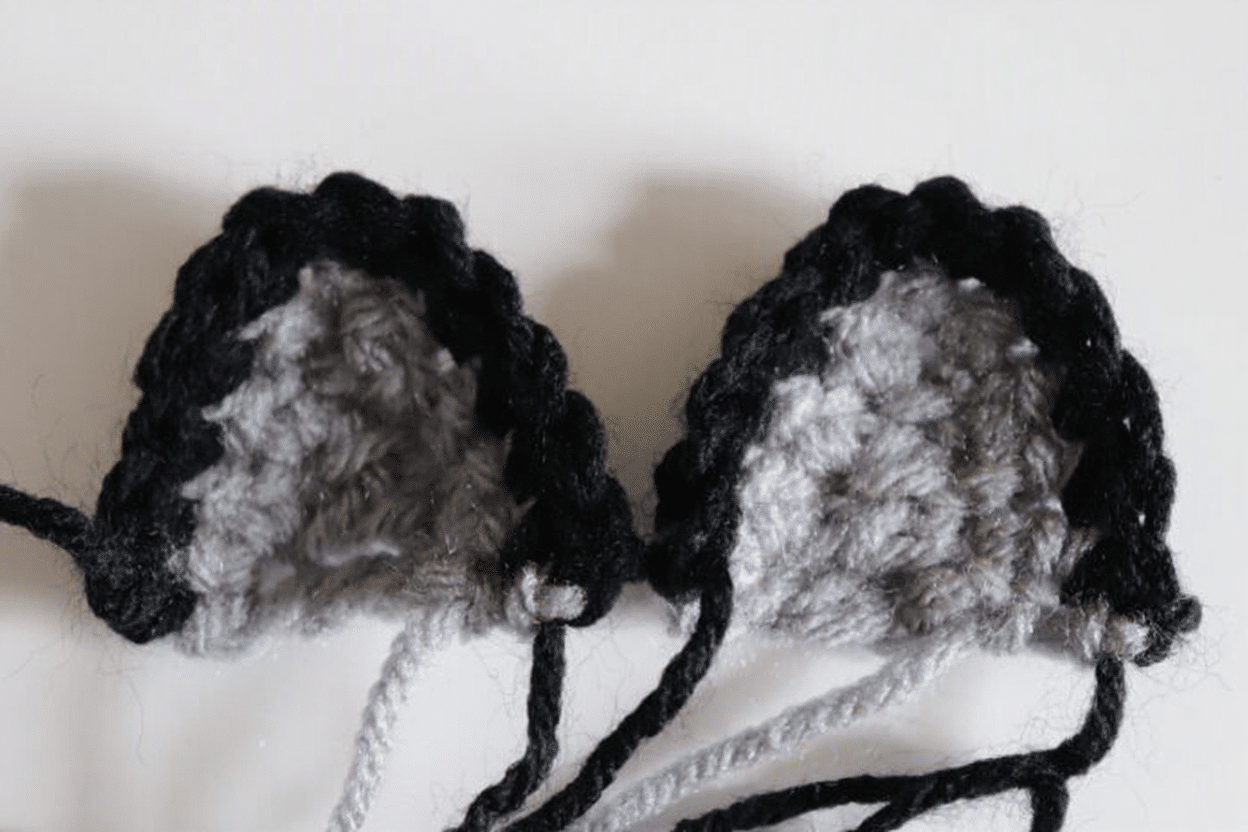
Ears (Make 2)
With gray yarn:
- Row 1: Chain 5, SC in second chain from hook, HDC in next, DC in last two, chain 1, turn.
- Row 2: 2 SC in first, SC in next 2, 2 SC in top stitch of ear, SC in next 2, 2 SC in last, join in black yarn, chain 1, turn.
- Row 3: SC in each stitch, make 2 SC in the top 2 stitches of ear (12 SC). Fasten off leaving long tails for sewing.
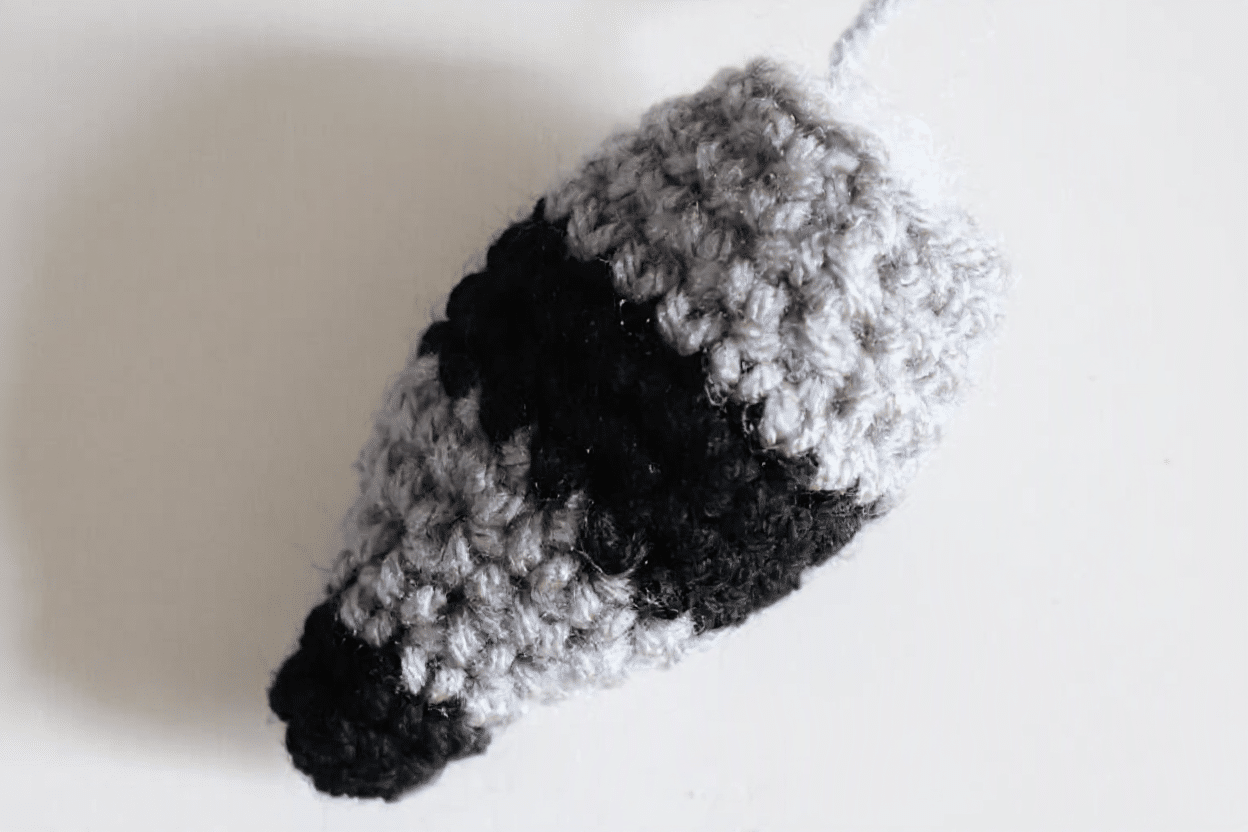
Tail (Make 1)
Starting with black yarn:
- Magic Ring: Chain 1 and make 6 SC in ring, join, chain 1.
- Round 2: 2 SC in first, SC in next 2, repeat around (8 SC). Join in gray yarn, chain 1.
- Round 3: SC in each stitch around, join, chain 1 (8 SC).
- Round 4: 2 SC in first, SC in next 3, repeat around, join, chain 1 (10 SC).
- Round 5: 2 SC in first, SC in next 4, repeat around, join, chain 1 (12 SC).
- Round 6: 2 SC in first, SC in next 5, repeat around (14 SC). Join in black yarn, chain 1.
- Round 7: SC in each stitch around, join, chain 1 (14 SC).
- Round 8: 2 SC in first, SC in next 6, repeat around, join, chain 1 (16 SC).
- Round 9: 2 SC in first, SC in next 7, repeat around (18 SC). Join in gray yarn, chain 1 (you can fasten off the black at this point).
- Round 10: SC in each stitch around, join, chain 1 (18 SC).
- Round 11: SC Decrease, SC in next 7, repeat around, join, chain 1 (16 SC).
- Round 12: SC Decrease, SC in next 6, repeat around, join, chain 1 (14 SC).
- Round 13: SC Decrease, SC in next 5, repeat around, join, fasten off (12 SC). Fasten off leaving a long tail for sewing.
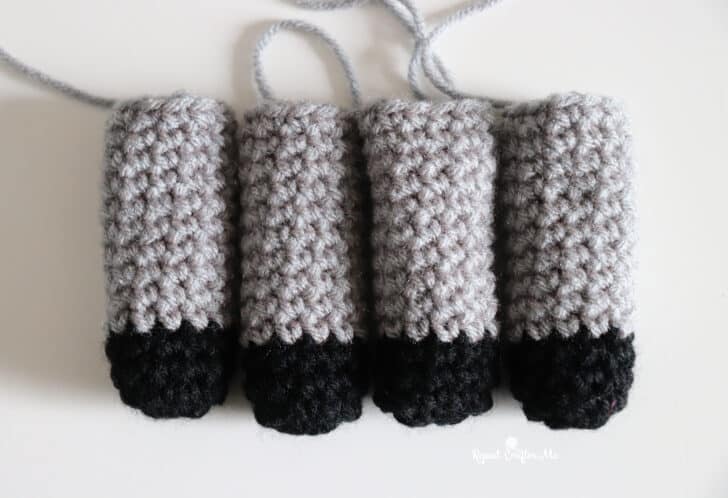
Legs (Make 4)
Starting with black yarn:
- Magic Ring: Chain 1 and make 10 SC in ring, join, chain 1.
- Round 2: 2 SC in first stitch, SC in next 4, repeat around, join, chain 1 (12 SC).
- Rounds 3-4: SC in each stitch around join, chain 1 (12 SC). After round 4, join in gray yarn (fasten off black), chain 1.
- Rounds 5-14: SC in each stitch around, join, chain 1 (12 SC). Fasten off leaving a long tail for sewing.
Assembly
Step 1: Prepare the Face
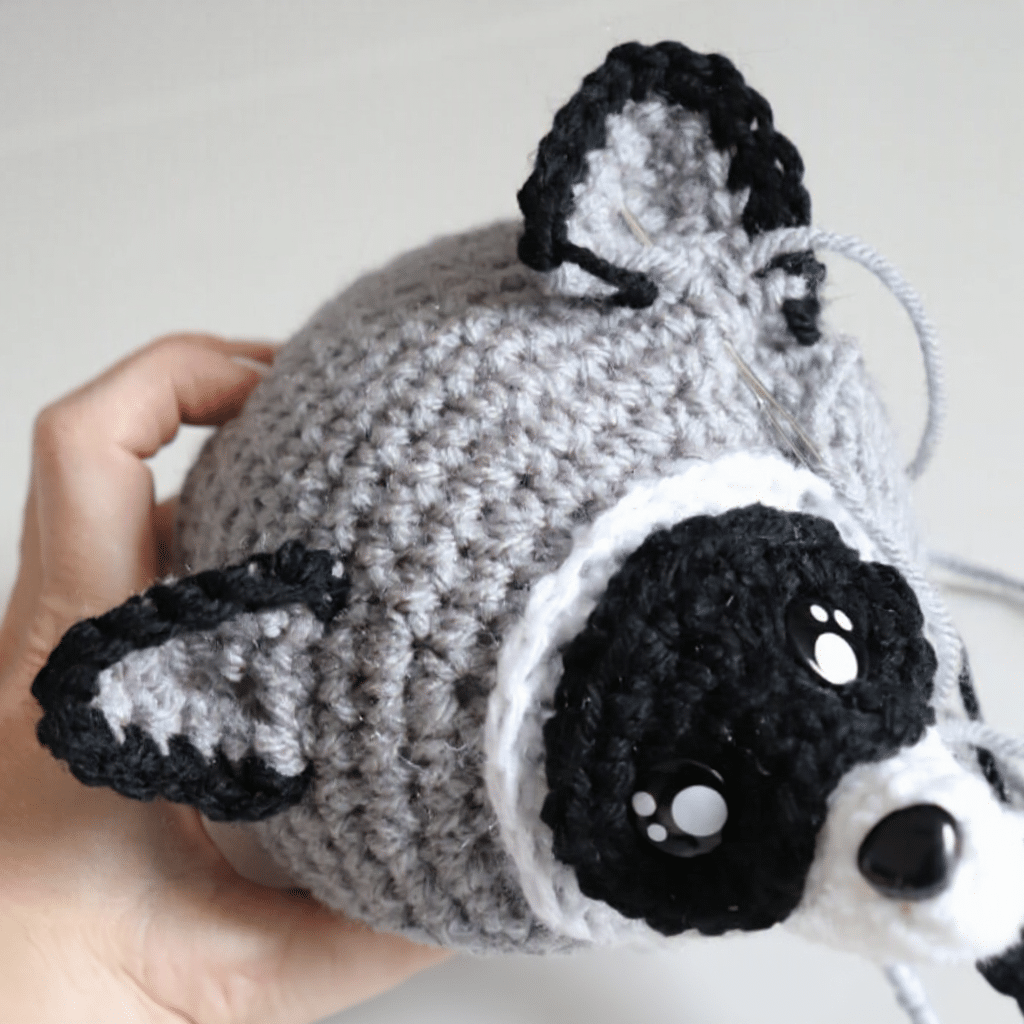
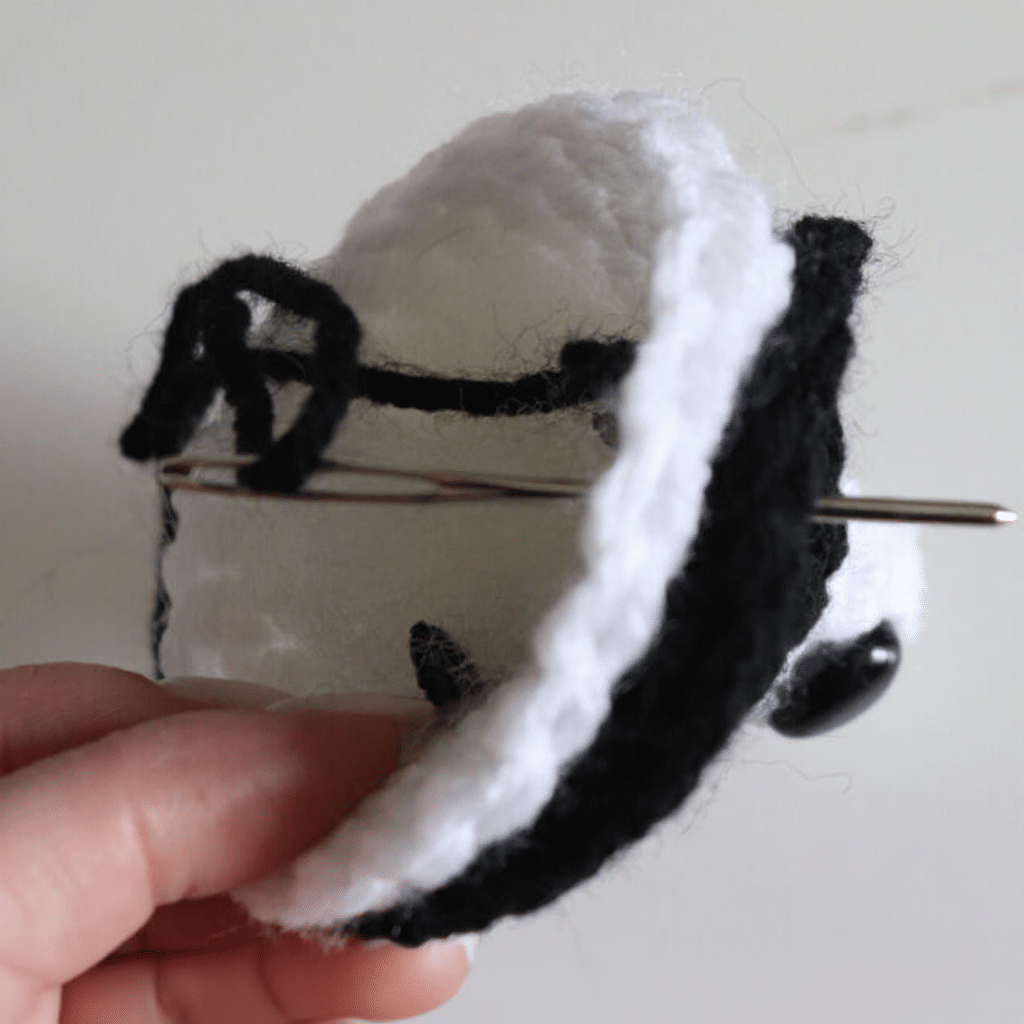
Insert the safety nose into the snout. Place the black eye patch over the front of the snout, positioning it just above the nose. Insert both safety eyes through the eye patch and the snout at the same time. This secures the eye patch in place before sewing. Now use the long black yarn tail to stitch around the outside edge of the eye patch so it lays nice and flat against the snout. Lightly stuff the snout with Polyfil.
Tip: Installing the safety eyes through both crochet pieces first makes positioning the eye patch much easier and prevents it from shifting while you sew.
Step 2: Attach the Snout
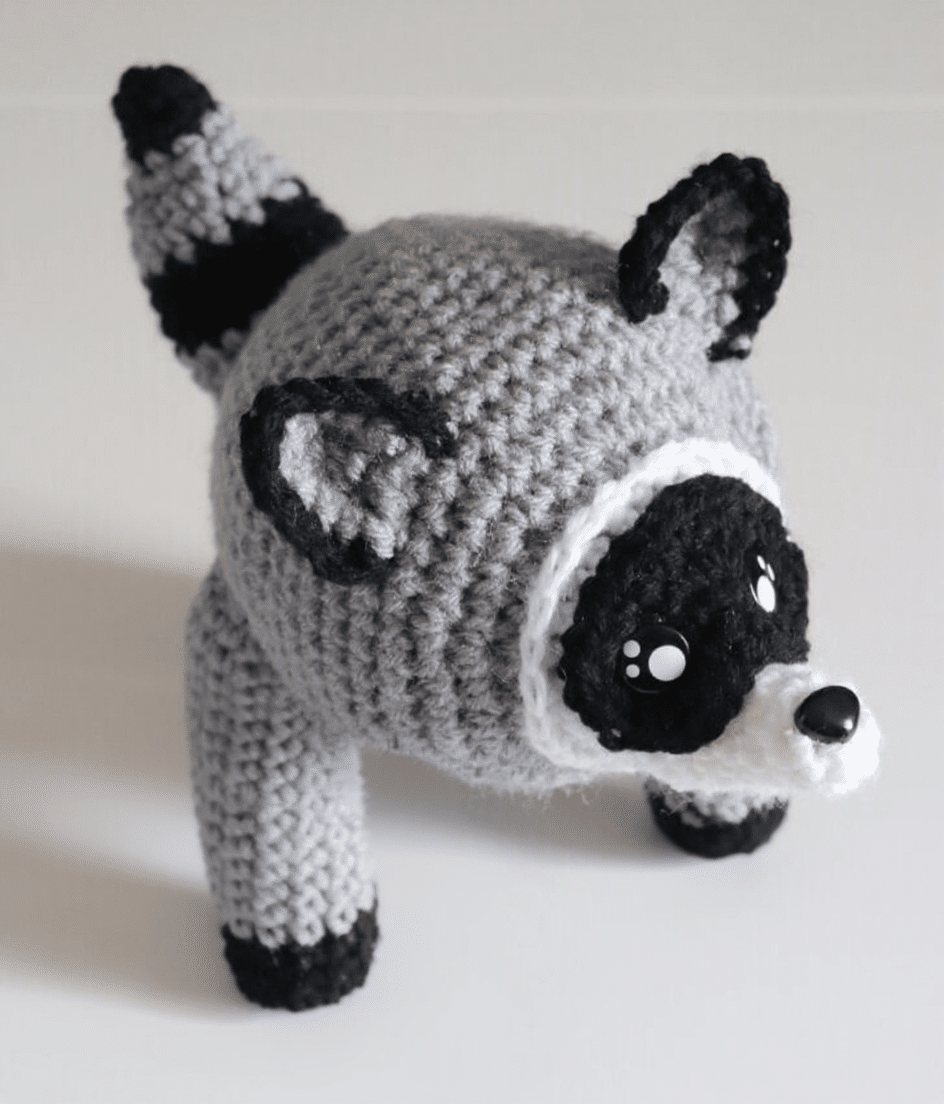
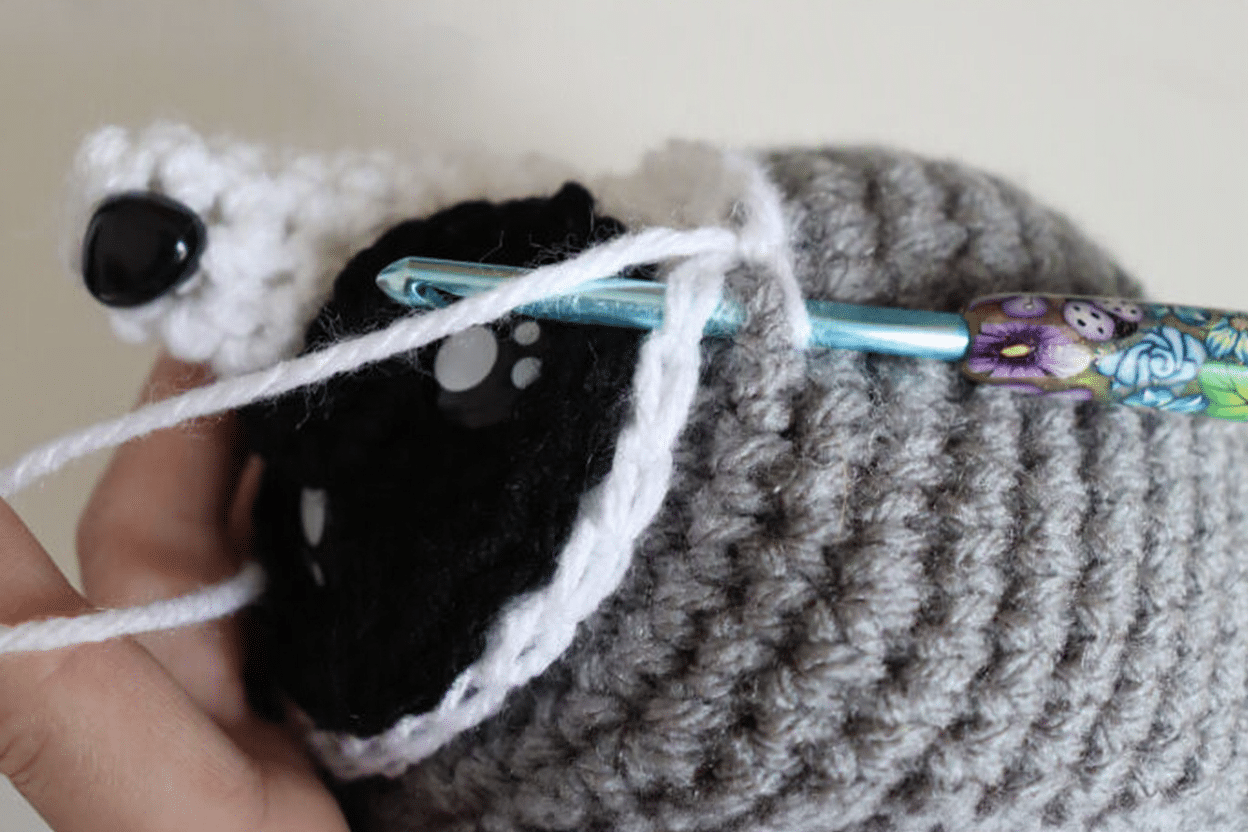
Position the completed snout on the larger end of the body (the side where you began with the magic ring). Instead of sewing, insert your hook through the outer edge of the snout and into approximately Round 4 of the body. Working with white yarn, single crochet evenly around until the snout is securely attached. Weave in the ends.
Step 3: Attach the Ears
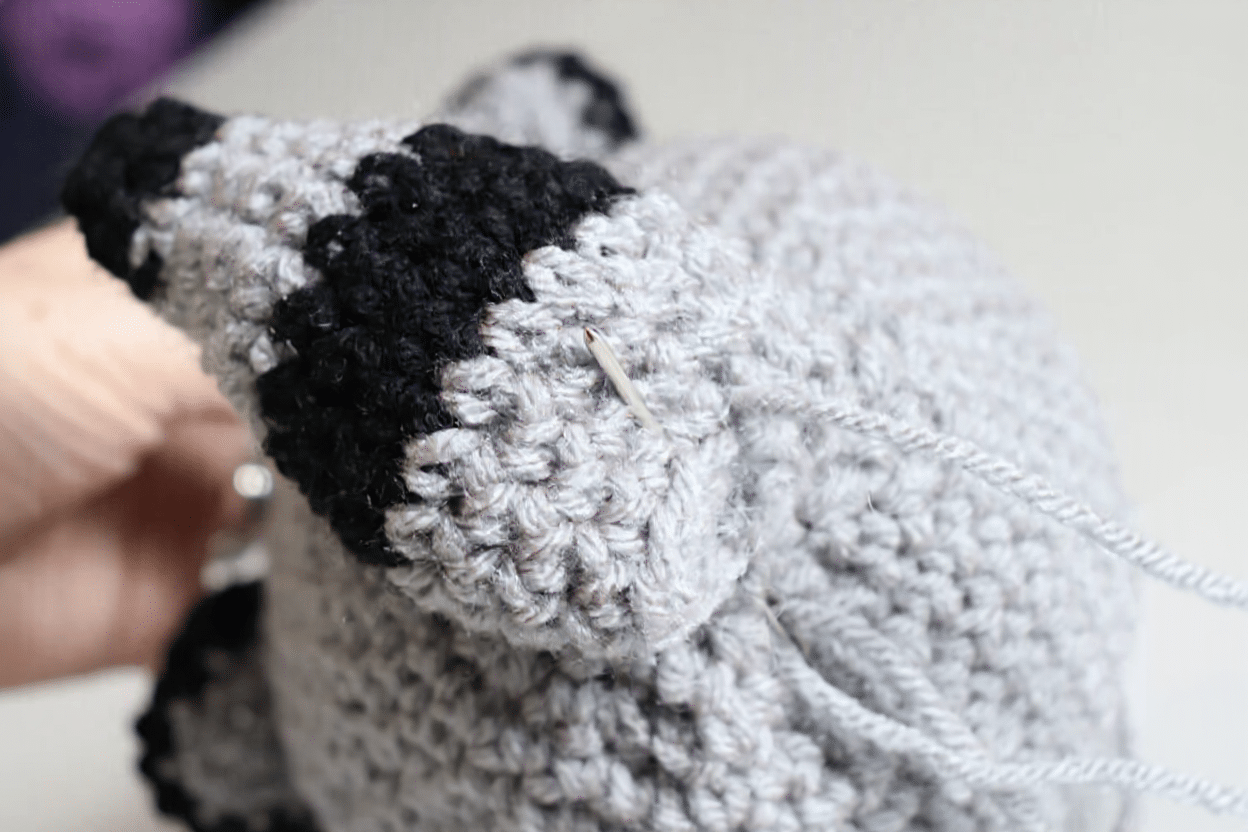
Position the ears approximately three rounds above the top of the face. Pin them in place first before sewing so you can adjust their angle until they look even. Using a tapestry needle and the long yarn tail, stitch the bottom edge of each ear to the head, leaving the rest of the ear unstitched so it stands up naturally.
Step 4: Attach the Tail
Stuff the tail with polyfil. Pinch the opening flat and center it on the back of the body, with the tail pointing upward. Using a tapestry needle and the long yarn tail, sew the flattened opening securely to the body.
Step 5: Attach the Legs
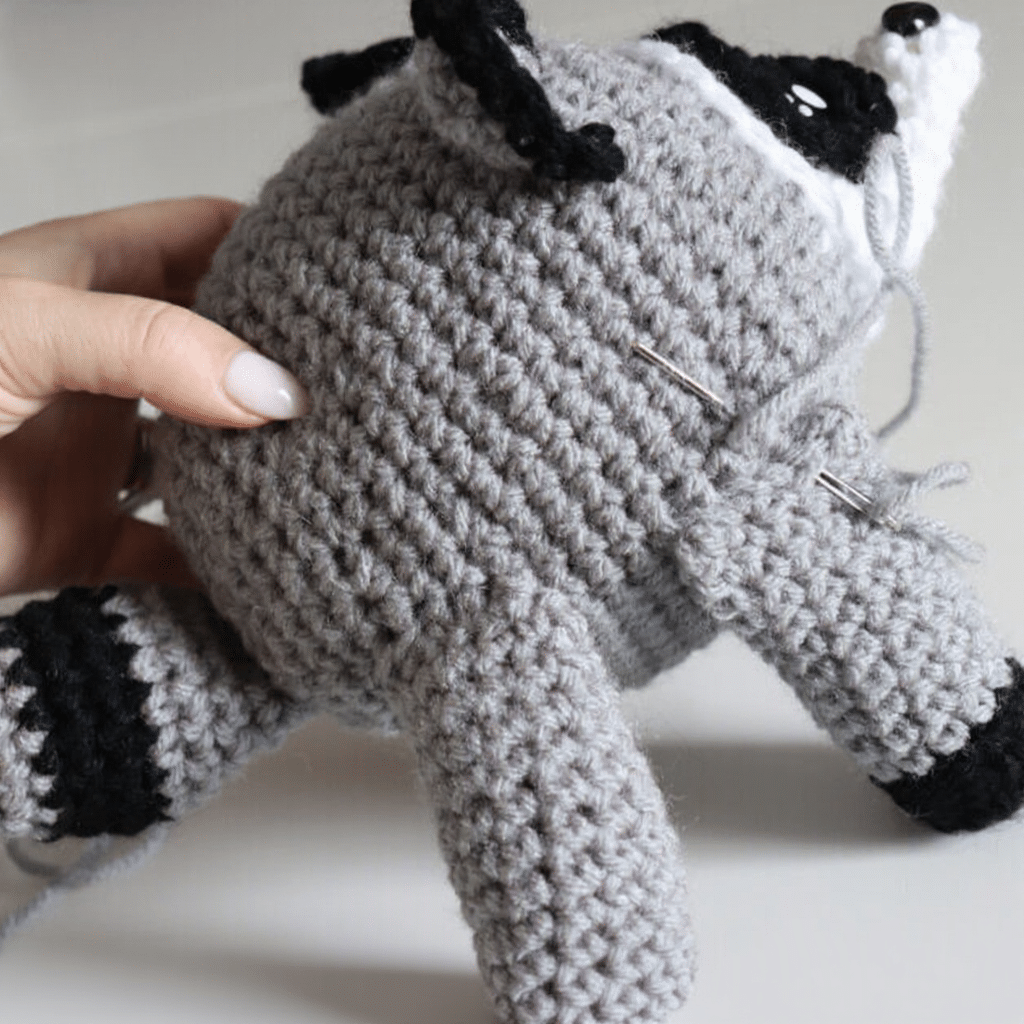
Stuff each leg with polyfil. Pinch the tops flat. Position two legs on each side of the body near the bottom. Take your time adjusting their placement before sewing—the spacing is what allows Jimothy to stand upright. Sew each leg securely to the body.
Tips
- Eye Patch Placement: Installing the safety eyes through both the snout and the eye patch simultaneously is the key to a neat face. It prevents the patch from sliding around while you sew it down.
- Standing Firmly: Ensure the legs are stuffed firmly and positioned symmetrically. If Jimothy tips over, adjust the angle of the legs slightly outward.
- Yarn Choice: Red Heart Super Saver is durable and holds stuffing well, making it ideal for a toy that might be hugged frequently.
FAQs
What size safety eyes should I use?
The pattern recommends approximately 14 mm kawaii safety eyes. If using a variety pack, hold them up to the black eye patch to ensure they are visible and proportional. Any size between 12–16 mm works well.
How do I make Jimothy stand up?
Proper leg placement is crucial. Stuff the legs firmly, pinch the tops flat, and position them symmetrically on the bottom of the body. Adjust the angle until he balances on his own before sewing.
Can I use a different yarn weight?
While Red Heart Super Saver is recommended for the correct gauge and durability, you can use other worsted weight yarns. However, you may need to adjust your hook size and stitch counts to achieve the correct finished size.
Why are the ears only sewn at the bottom?
Sewing only the bottom edge of the ears allows the rest of the ear to stand up naturally, giving Jimothy a more alert and realistic raccoon appearance.
Is this pattern suitable for beginners?
This pattern is best for crocheters with basic amigurumi experience, as it involves working in the round, changing colors, and assembling multiple parts. If you are new to amigurumi, consider checking out our easy crochet letter S pattern or the easy crochet Halloween bat pattern for simpler projects.
Pin This Crochet Pattern!