There is a specific kind of magic that happens when you reach into your stash and pull out a skein of plush or chenille yarn in a warm caramel or butter brown shade. It feels intentional, like the yarn itself is whispering that it was waiting for this exact moment to become something soft and huggable. This Mini Butter Bear Amigurumi Pattern captures that cozy feeling perfectly, transforming simple stitches into a sweet plush friend with a tiny apron and a big personality.
Yarn and Color Notes
The choice of yarn defines the character of this bear. Plush or chenille yarns are ideal here because they create a dense, rounded silhouette that feels incredibly soft to the touch. The caramel or butter brown main color gives the bear a warm, classic teddy-bear look, while the white apron and aqua blue ruffle add a playful, kitchen-helper charm. If you prefer a firmer toy with more visible stitch definition, cotton yarn is a great alternative, though it will result in a slightly smaller and less fluffy finish. The contrast between the soft brown body and the crisp white apron makes this project a standout addition to any nursery shelf or craft collection.
Project Overview
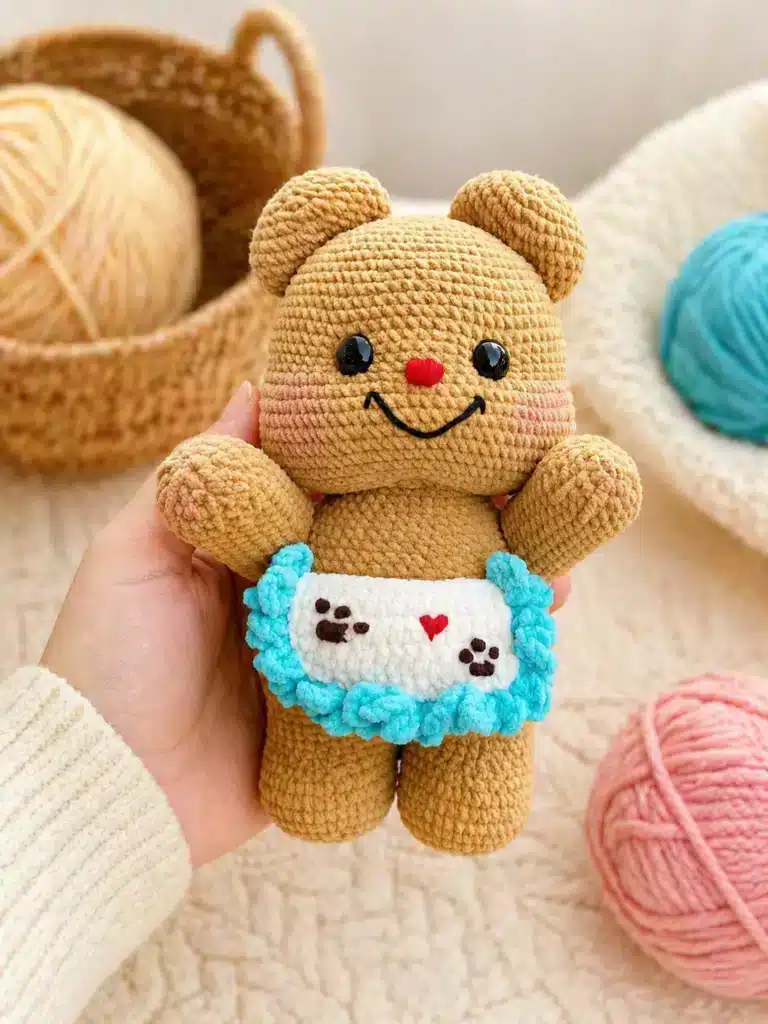
This Mini Butter Bear Crochet Pattern is a sweet plush amigurumi project featuring a soft teddy-bear body, big safety eyes, a rounded head, tiny tail, and a charming apron. The simple shape makes it cute and cuddly, while the blue ruffle and red heart details give it a special handmade personality. It is a lovely project for gifts, nursery decorations, craft fairs, or your own amigurumi collection. Once you make one butter bear, you may want to make a whole family in different apron colors.
Materials
- 2.0 mm crochet hook
- 20 mm safety eyes
- Plush or chenille yarn (Main bear color: caramel or butter brown)
- White yarn for apron
- Aqua blue yarn for apron ruffle and straps
- Small red yarn for nose and heart
- Small black yarn for mouth and paw details
- Fiberfill stuffing
- Yarn needle
- Stitch marker
- Scissors
Gauge and Finished Size
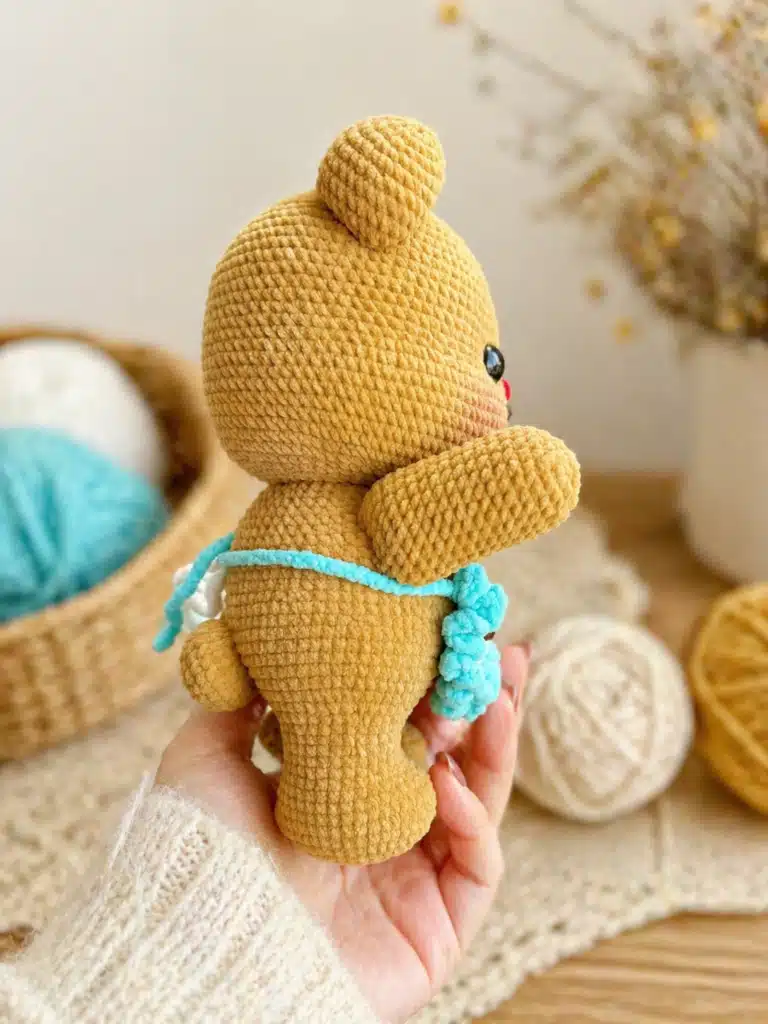
The final size depends on your yarn, hook, and tension. With plush or chenille yarn and a 2.0 mm hook, your bear will have a soft mini amigurumi size. If you use thicker plush yarn, the bear will become larger. There is no strict gauge requirement, but maintaining consistent tension is key to ensuring the pieces fit together correctly during assembly.
Abbreviations
US Terms
- MR = magic ring
- sc = single crochet
- inc = increase, 2 sc in the same stitch
- dec = decrease
- ch = chain
- sl st = slip stitch
- dc = double crochet
- FO = fasten off
Pattern Notes
- Work in continuous rounds unless the pattern says otherwise.
- Use a stitch marker to mark the first stitch of each round.
- Stuff the body and head firmly, especially when working with plush yarn.
- Plush yarn can hide stitches easily, so count each round carefully.
- The 20 mm safety eyes should be added before the head opening becomes too small. You can test the position first, then secure them when you are happy with the expression.
Pattern Instructions
Legs and Body
The body is made by crocheting two separate legs first, then joining them together to continue upward.
Leg 1
Use caramel or butter brown yarn.
- Rnd 1: 8 sc in MR. [8]
- Rnd 2: inc ×8. [16]
- Rnd 3: (sc, inc) ×8. [24]
- Rnd 4: (sc, inc, sc) ×8. [32]
- Rnd 5: (3 sc, inc) ×8. [40]
- Rnd 6–9: 40 sc. [40]
- Rnd 10: sc, dec, 11 sc, (sc, dec) ×4, 12 sc, dec. [34]
- Rnd 11: 13 sc, dec ×4, 13 sc. [30]
- Rnd 12–15: 30 sc. [30]
FO.
Leg 2
Repeat Rnd 1–15, but do not fasten off if you want to continue directly into the body join.
Join Legs and Body
- Rnd 16: Join the two legs together. Start from the 8th stitch of one leg, then connect to the 24th stitch of the second leg. Crochet around both legs: 30 sc around one leg + 30 sc around the other leg. [60]
- Rnd 17: (9 sc, inc) ×6. [66]
- Rnd 18: (5 sc, inc, 5 sc) ×6. [72]
- Rnd 19: 2 inc, 15 sc, 2 inc, 16 sc, 4 inc, 15 sc, 2 inc, 14 sc, 2 inc. [84]
- Rnd 20–25: 84 sc. [84]
- Rnd 26: (6 sc, dec, 6 sc) ×6. [78]
- Rnd 27: 78 sc. [78]
- Rnd 28: (11 sc, dec) ×6. [72]
- Rnd 29: 72 sc. [72]
- Rnd 30: (5 sc, dec, 5 sc) ×6. [66]
- Rnd 31: (9 sc, dec) ×6. [60]
- Rnd 32: (4 sc, dec, 4 sc) ×6. [54]
- Rnd 33: (7 sc, dec) ×6. [48]
- Rnd 34: (3 sc, dec, 3 sc) ×6. [42]
- Rnd 35: (5 sc, dec) ×6. [36]
Stuff the body firmly. Leave the opening for sewing the head.
Head
Use caramel or butter brown yarn.
- Rnd 1: 8 sc in MR. [8]
- Rnd 2: inc ×8. [16]
- Rnd 3: (sc, inc) ×8. [24]
- Rnd 4: (sc, inc, sc) ×8. [32]
- Rnd 5: (3 sc, inc) ×8. [40]
- Rnd 6: (2 sc, inc, 2 sc) ×8. [48]
- Rnd 7: (5 sc, inc) ×8. [56]
- Rnd 8: (3 sc, inc, 3 sc) ×8. [64]
- Rnd 9: 64 sc. [64]
- Rnd 10: (7 sc, inc) ×8. [72]
- Rnd 11: 72 sc. [72]
- Rnd 12: (4 sc, inc, 4 sc) ×8. [80]
- Rnd 13–19: 80 sc. [80]
- Rnd 20: (4 sc, dec, 4 sc) ×8. [72]
- Rnd 21: 72 sc. [72]
- Rnd 22: 20 sc, inc ×12, 8 sc, inc ×12, 20 sc. [96]
- Rnd 23–30: 96 sc. [96]
- Rnd 31: 20 sc, dec ×12, 8 sc, dec ×12, 20 sc. [72]
- Rnd 32: (7 sc, dec) ×8. [64]
- Rnd 33: (3 sc, dec, 3 sc) ×8. [56]
- Rnd 34: (5 sc, dec) ×8. [48]
- Rnd 35: (3 sc, dec, 3 sc) ×6. [42]
- Rnd 36: (5 sc, dec) ×6. [36]
Stuff the head firmly. Leave a long tail for sewing.
Add the 20 mm safety eyes before the opening becomes too small. Place them evenly on the front of the face, then secure the washers when you are satisfied with the look. Embroider the red nose and black smile after stuffing. A tiny red nose gives this mini butter bear crochet pattern its sweet handmade expression.
Arms ×2
Use caramel or butter brown yarn.
- Rnd 1: 8 sc in MR. [8]
- Rnd 2: inc ×8. [16]
- Rnd 3: (sc, inc) ×8. [24]
- Rnd 4–17: 24 sc. [24]
- Rnd 18: (sc, dec, sc) ×6. [18]
Stuff lightly. FO and leave a long tail for sewing.
Ears ×2
Use caramel or butter brown yarn.
- Rnd 1: 8 sc in MR. [8]
- Rnd 2: inc ×8. [16]
- Rnd 3: (sc, inc) ×8. [24]
- Rnd 4: (sc, inc, sc) ×8. [32]
- Rnd 5: (3 sc, inc) ×8. [40]
- Rnd 6–9: 40 sc. [40]
- Rnd 10: (3 sc, dec) ×8. [32]
Stuff lightly if needed. FO and leave a long tail for sewing.
Tail
Use caramel or butter brown yarn.
- Rnd 1: 8 sc in MR. [8]
- Rnd 2: inc ×8. [16]
- Rnd 3: (sc, inc) ×8. [24]
- Rnd 4–6: 24 sc. [24]
- Rnd 7: (sc, dec) ×8. [16]
Stuff lightly. FO and leave a long tail for sewing.
Apron
Use white yarn.
- Row 1: Ch 16. Starting in the 2nd ch from hook, make 15 sc. [15]
- Row 2–7: Ch 1, turn, 15 sc. [15]
Now work around the other three sides of the apron with sc to create a neat border.
Blue Ruffle Edging
Join aqua blue yarn to one side of the apron.
- Repeat around the three outer sides: Ch 3, 3 dc, sl st in the next stitch.
Continue this shell-style edging around the apron sides and bottom. At both top corners of the apron, chain enough stitches to create waist ties. Make the chains as long as needed to tie around the bear.
Assembly
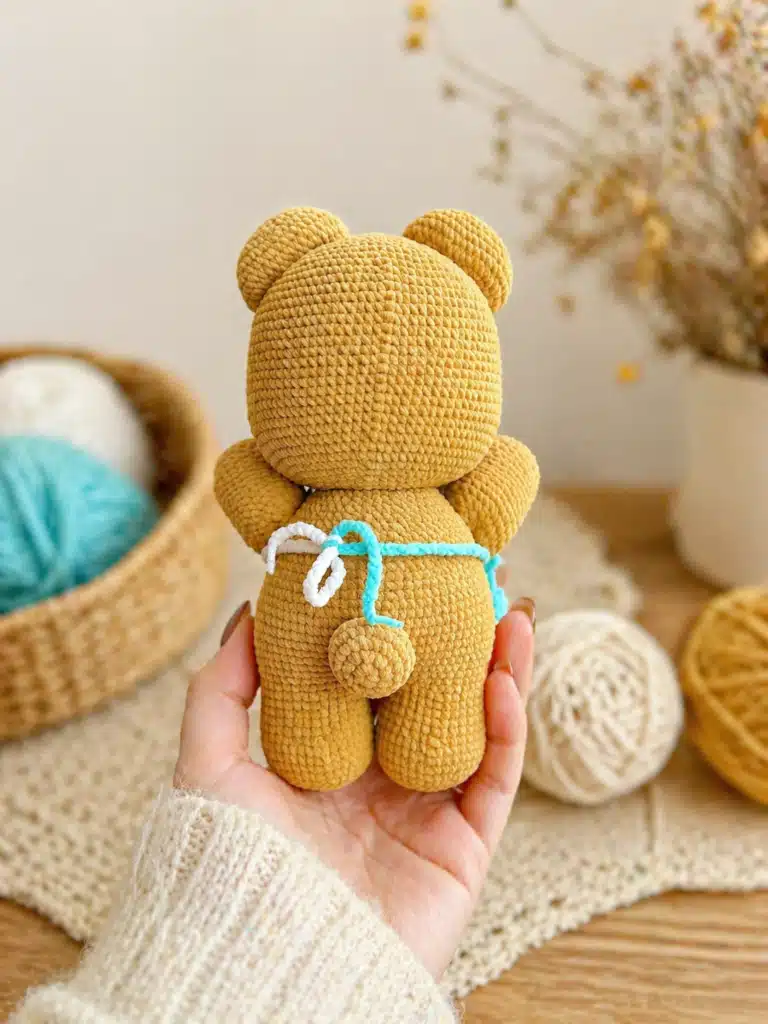
Sew the head to the body, matching the 36-stitch openings. Sew the ears to the top sides of the head. Sew the arms to the sides of the body. Sew the tail to the back of the body. Tie or sew the apron around the waist. Embroider the red nose. Embroider the black smiling mouth. Add a red heart on the apron. Add small black paw details on the apron if desired.
Before sewing everything permanently, pin the ears, arms, and apron in place. This helps you check the symmetry and makes the finished bear look balanced. Use a yarn needle and matching yarn tails for invisible sewing. Plush yarn can be bulky, so sew slowly and shape the pieces with your hands as you go. When sewing the head to the body, add extra stuffing inside the neck area before closing completely. This helps the head stay upright.
Tips
- If the leg join feels a little confusing, take your time to align both feet before continuing. This helps the bear sit evenly.
- Do not overstuff the arms. A soft, slightly flat arm usually sits better against the body.
- Flatten the lower edge slightly before sewing. This gives the ears a cute rounded teddy-bear shape.
- For the apron, do not make the waist chains too short. It is better to make them slightly longer, tie the apron, then trim and weave in the ends if needed.
- If you want a softer baby-style bear, skip the paw embroidery and keep the apron simple. If you want a more playful kitchen-bear look, add the red heart and tiny black paw marks.
FAQs
Is this mini butter bear crochet pattern beginner-friendly?
This pattern is best for intermediate beginners. The stitches are simple, but the plush yarn, large stitch counts, and sewing steps require patience. You should already know how to make a magic ring, single crochet, increase, decrease, and sew amigurumi parts together.
Can I use cotton yarn instead of plush yarn?
Yes. Cotton yarn will create a smaller and firmer bear. The stitches will be easier to see, but the final toy will not be as fluffy as the chenille version.
What size safety eyes should I use?
This pattern uses 20 mm safety eyes. If your yarn is thinner, you may need smaller eyes so the face stays proportional.
Can I make the apron removable?
Yes. Make the blue waist chains long enough to tie around the body. This lets you remove the apron whenever you want. You can also sew the apron permanently to the body if the bear is made for display or for a child who may untie the straps easily.
Can I sell finished bears made from this pattern?
Yes, handmade finished items can usually be sold in small quantities. Add your own photos and credit the pattern source when possible.
Pin This Crochet Pattern!