There is something undeniably charming about holding a tiny amigurumi doll with a soft gothic-kawaii personality. This Kuromi-Inspired Amigurumi Crochet Pattern results in a cute purple jester bunny that is perfect for displaying on a desk, attaching as a bag charm, or gifting to a friend who loves handmade toys. The finished piece is tidy, squishy, and display-worthy, featuring a lavender hood, pointy ears, tiny pom-poms, and a sweet forehead applique that captures the playful spirit of the character.
Why the Finished Piece Stands Out
What makes this project truly special is the layered construction. Unlike many amigurumi dolls where the hood is crocheted directly onto the head, this design features a separate hood that sits cleanly over the head. This gives the doll a polished, professional look with a distinct “jester-bunny” silhouette. The addition of the small pink forehead applique creates a cute skull-style detail without overwhelming the face, while the ruffled collar adds a playful finish around the neck. The combination of the soft white body and the vibrant purple accents makes for a striking color contrast that looks adorable whether you stick to the classic palette or experiment with pastel variations.
Project Overview
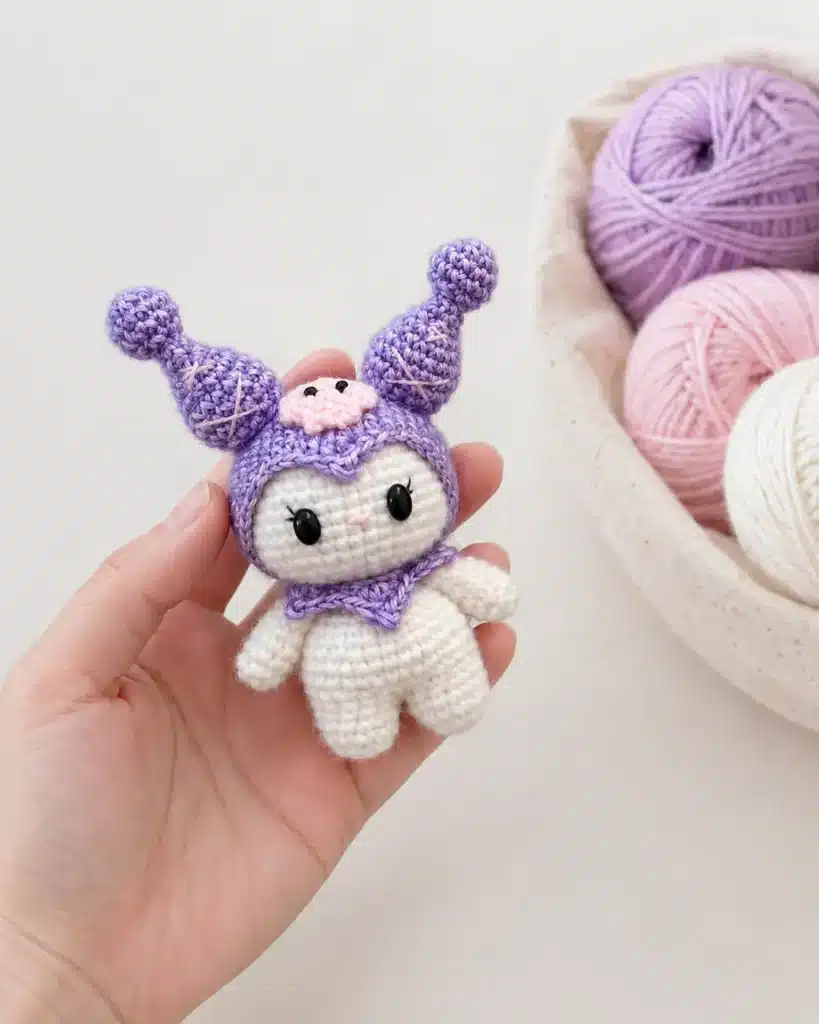
This Kuromi-Inspired Amigurumi Crochet Pattern is designed as a cute purple jester bunny with a white face and body. It is made from separate pieces that are sewn together at the end, including the head, body, arms, hood, ears, pom-poms, forehead applique, and collar. The pattern is written in US crochet terms and is suitable for crocheters who are ready to move beyond the absolute basics.
Project Details
- Project Type: Amigurumi
- Skill Level: Intermediate beginner
- Finished Size: Approximately 9–12 cm tall (depending on yarn and hook size)
Materials
To make this Kuromi-Inspired Amigurumi Crochet Pattern, you will need:
- 2.0 mm crochet hook
- Cotton or milk cotton yarn
- Fiberfill stuffing
- Safety eyes or black beads
- Black embroidery thread
- Pink embroidery thread
- Yarn needle
- Stitch marker
- Scissors
Suggested Yarn Colors
- White / cream: For the face and body
- Purple / lavender: For the hood, ears, collar, and pom-poms
- Soft pink: For the forehead applique
- Black: For the eyes and face details
- Light pink: For blush or tiny nose details
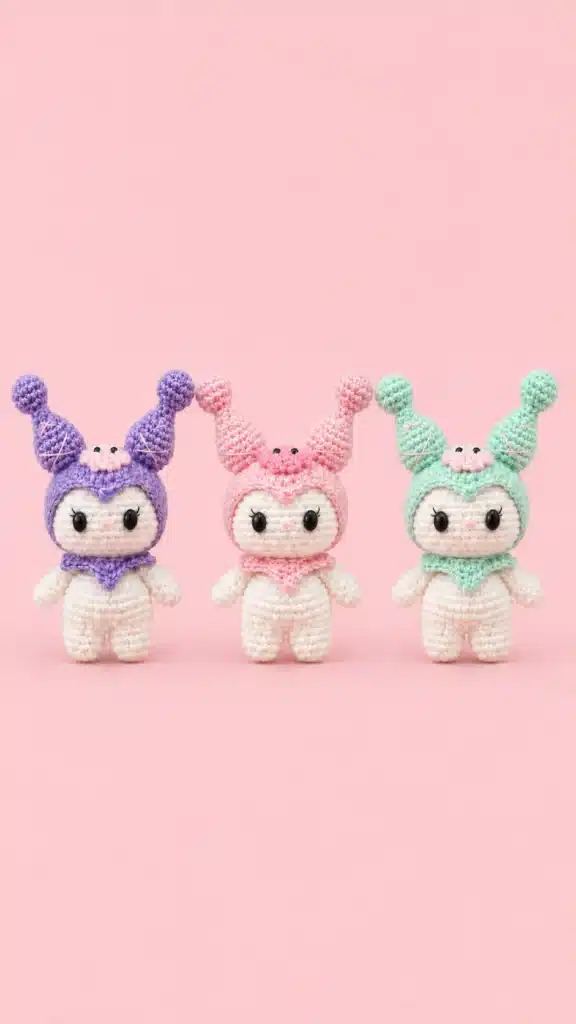
Note: You can also change the hood color to black, pastel purple, dark violet, or even pink if you want a softer version.
Gauge and Finished Size
The final size depends on your yarn, hook, and tension. With a 2.0 mm crochet hook and cotton or milk cotton yarn, your finished doll will usually be around 9–12 cm tall. You can make it smaller with thinner yarn or larger with plush yarn and a bigger hook.
Abbreviations
This pattern uses US crochet terms:
- MR = magic ring
- ch = chain
- sl st = slip stitch
- sc = single crochet
- inc = increase, 2 sc in the same stitch
- dec = invisible decrease
- hdc = half double crochet
- dc = double crochet
- tr = treble crochet
- picot = picot stitch
- FO = fasten off
Pattern Notes
- Work in continuous rounds unless otherwise stated. Use a stitch marker to mark the first stitch of each round.
- Stuff the head and body firmly, but do not overstuff the arms or ears.
- The hood is made separately and placed over the head.
- The small forehead applique is sewn on after the hood is finished.
- Pin all pieces before sewing to check the final position.
- Keep the face simple and soft for a cute kawaii look.
Pattern Instructions
1. Head
Use white / cream yarn.
- Rnd 1: 6 sc in MR. [6]
- Rnd 2: inc around. [12]
- Rnd 3: (sc, inc) x6. [18]
- Rnd 4: (sc, inc, sc) x6. [24]
- Rnd 5: (3 sc, inc) x6. [30]
- Rnd 6: (2 sc, inc, 2 sc) x6. [36]
- Rnd 7: (5 sc, inc) x6. [42]
- Rnd 8–15: sc around. [42]
- Rnd 16: (5 sc, dec) x6. [36]
- Rnd 17: (2 sc, dec, 2 sc) x6. [30]
- Rnd 18: (3 sc, dec) x6. [24]
- Rnd 19: (sc, dec, sc) x6. [18]
Stuff the head firmly. Fasten off, leaving a long tail for sewing.
2. Legs and Body
Use white / cream yarn.
Legs
Make 2 legs.
- Rnd 1: 6 sc in MR. [6]
- Rnd 2: inc around. [12]
- Rnd 3–5: sc around. [12]
Fasten off the first leg. Do not fasten off the second leg. Continue to join the legs.
Body
- Rnd 6: Join both legs and crochet 24 sc around. [24]
- Rnd 7: (3 sc, inc) x6. [30]
- Rnd 8–9: sc around. [30]
- Rnd 10: (3 sc, dec) x6. [24]
- Rnd 11–12: sc around. [24]
- Rnd 13: (2 sc, dec) x6. [18]
- Rnd 14–15: sc around. [18]
Stuff the body firmly. Fasten off, leaving a long tail for sewing.
3. Arms
Use white / cream yarn. Make 2 arms.
- Rnd 1: 6 sc in MR. [6]
- Rnd 2: (2 sc, inc) x2. [8]
- Rnd 3–7: sc around. [8]
- Rnd 8: (2 sc, dec) x2. [6]
Lightly stuff the arms. Flatten the opening and fasten off. Leave a long tail for sewing.
4. Hood
Use purple / lavender yarn.
- Rnd 1: 6 sc in MR. [6]
- Rnd 2: inc around. [12]
- Rnd 3: (sc, inc) x6. [18]
- Rnd 4: (sc, inc, sc) x6. [24]
- Rnd 5: (3 sc, inc) x6. [30]
- Rnd 6: (2 sc, inc, 2 sc) x6. [36]
- Rnd 7: (5 sc, inc) x6. [42]
- Rnd 8–14: sc around. [42]
- Rnd 15: 17 sc, sl st, sc, hdc, dc, (tr, picot, tr) in next stitch, dc, hdc, sc, sl st, 16 sc.
Fasten off and leave a long tail for sewing. Place the hood over the head and adjust the front opening before sewing. The shaped front opening is what gives this Kuromi-Inspired Amigurumi Crochet Pattern its cute jester-bunny look.
5. Ears
Use purple / lavender yarn. Make 2 ears.
- Rnd 1: 6 sc in MR. [6]
- Rnd 2: sc around. [6]
- Rnd 3: (sc, inc) x3. [9]
- Rnd 4: (sc, inc, sc) x3. [12]
- Rnd 5: (3 sc, inc) x3. [15]
- Rnd 6: (2 sc, inc, 2 sc) x3. [18]
- Rnd 7–8: sc around. [18]
- Rnd 9: (sc, dec) x6. [12]
Lightly stuff the ears. Flatten the bottom and fasten off. Leave a long tail for sewing.
6. Ear Pom-Poms
Use purple / lavender yarn. Make 2 small balls.
- Rnd 1: 6 sc in MR. [6]
- Rnd 2: inc around. [12]
- Rnd 3–4: sc around. [12]
- Rnd 5: dec around. [6]
Stuff lightly. Close the opening and sew one pom-pom to the tip of each ear. These little pom-poms make the doll look more playful and give the ears a finished jester-style detail.
7. Forehead Applique
Use soft pink yarn.
- Rnd 1: 6 sc in MR. [6]
- Rnd 2: inc, (dc, tr, dc) in next stitch, inc, inc, (dc, tr, dc) in next stitch, inc.
- Rnd 3: Work 3 small decorative points in the center area: ch 2, picot stitch, repeat 3 times.
Fasten off and leave a long tail for sewing. Sew the applique to the front center of the hood. This applique gives the doll its cute skull-style detail.
8. Collar
Use purple / lavender yarn.
- Ch 25.
- Work the following repeat 5 times: [sl st, hdc, (dc, picot, dc), hdc, sl st]
Fasten off and leave a tail for sewing. Sew the collar around the neck after attaching the head to the body. The collar adds a cute ruffled detail and helps cover the seam between the head and body.
Face Details
You can add safety eyes before fully finishing the head, or sew black beads or embroider the eyes after assembly. Suggested placement:
- Place the eyes on the white face area.
- Embroider a tiny nose using pink thread.
- Add small blush marks with light pink thread.
Keep the face simple and soft. Avoid making the embroidery too large, because the hood and applique are already strong design details. For a cute expression, place the eyes evenly and keep the nose low and tiny.
Assembly
- Sew the head to the body.
- Sew the arms to both sides of the body.
- Place the purple hood over the head. Sew the hood carefully around the edge.
- Sew the ears to the top of the hood.
- Attach one pom-pom to each ear tip.
- Sew the pink forehead applique to the front center of the hood.
- Sew the collar around the neck.
- Add the eyes, nose, blush, and final embroidery details.
- Weave in all yarn tails neatly.
Before sewing everything permanently, use pins to test the placement. Look at the doll from the front, side, and top. This will help you balance the ears, collar, and applique. A neat hood, even ears, and centered applique will make your Kuromi-Inspired Amigurumi Crochet Pattern look polished and adorable.
Tips
- If you are still new to amigurumi, you may want to review my helpful guide on how to make an invisible decrease in crochet before starting, because neat decreases will make the head and body look smoother.
- You can also change the hood color to black, pastel purple, dark violet, or even pink if you want a softer version.
- For stitch help, you can use my beginner tutorial on how to single crochet.
- To make the doll look clean and balanced, pin all pieces in place before sewing. Check the position of the ears, collar, and forehead applique from the front view before attaching them permanently.
FAQ
Is this Kuromi-Inspired Amigurumi Crochet Pattern beginner-friendly?
It is best for intermediate beginners. You should know how to crochet in rounds, increase, decrease, stuff small pieces, and sew amigurumi parts together.
Can I use plush yarn for this pattern?
Yes, but the finished doll will be larger. You may need a bigger hook and larger safety eyes.
Can I turn this doll into a keychain?
Yes. Use cotton yarn and firm stuffing, then attach a keychain ring securely to the top of the hood.
Can I change the hood color?
Yes. Purple, black, pink, and pastel lavender all work beautifully for this design.
Do I need safety eyes?
No. You can use safety eyes, black beads, or embroidered eyes.
Is this an official Kuromi pattern?
No. This is a fan-inspired handmade crochet pattern with a purple jester bunny style. It is not an official licensed character pattern.
Pin This Crochet Pattern!