It is completely normal to worry that your magic ring will turn into a tight, unworkable knot or that your first few rounds will look uneven. Many beginners fear that a single mistake at the start will ruin the entire project. However, this flat bunny applique pattern is designed to be forgiving and straightforward. By following a simple circular head and separate ear instructions, you can create a charming motif without needing advanced shaping skills. Once you master the initial ring, the rest of the project flows quickly, making it a perfect confidence-builder for spring crafting.
Maker Notes
This flat bunny applique is one of those projects that feels deceptively simple but yields a highly polished result. The charm lies in the specific stitch placement that creates the “cheek” line on the bunny’s face. When working the head, the increase of treble crochets creates a soft curve that mimics a round, sweet face. I recommend using a lightweight cotton yarn for crisp stitch definition, which helps the geometric shaping stand out. If you prefer a softer, more plush appearance, a slightly fuzzy acrylic works beautifully. The versatility of this motif is its greatest strength; it is small enough to stash-bust but distinct enough to be the focal point of a nursery gift or a spring garland.
Project Overview
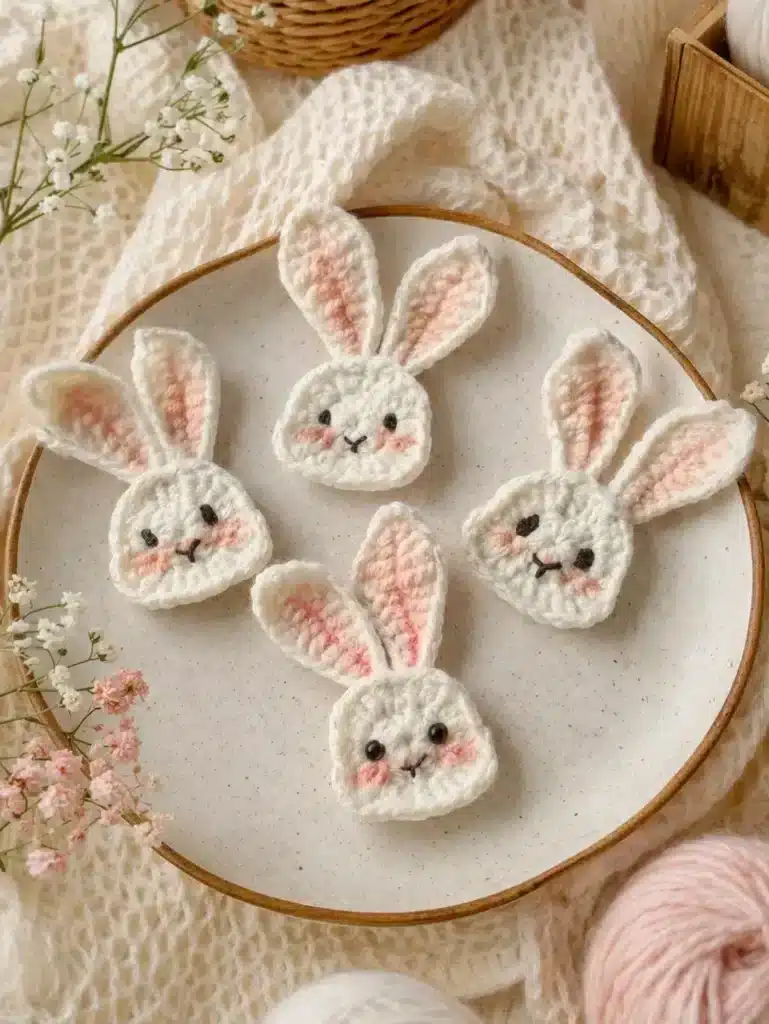
This flat bunny applique crochet pattern is a great project when you want something small, fast, and useful. You can finish one bunny quite quickly, and once you make the first one, it becomes easy to create a whole set in different colors. It is also perfect for stash-busting. A little bit of white, cream, pink, and black yarn is usually enough. If you want help choosing the best yarn thickness and hook pairing, this yarn weight, gauge, and hook size guide is a very useful reference.
Materials
- Lightweight cotton yarn or soft acrylic yarn (White, cream, or pastel yarn for the bunny)
- Light pink or blush yarn for the ear inner detail
- Black embroidery thread for the face
- Crochet hook that matches your yarn
- Yarn needle
- Scissors
- Optional: Blush powder or soft pink yarn for cheeks
If you need a refresher on starting the center neatly, this article on magic ring vs chain circle is especially helpful.
Abbreviations
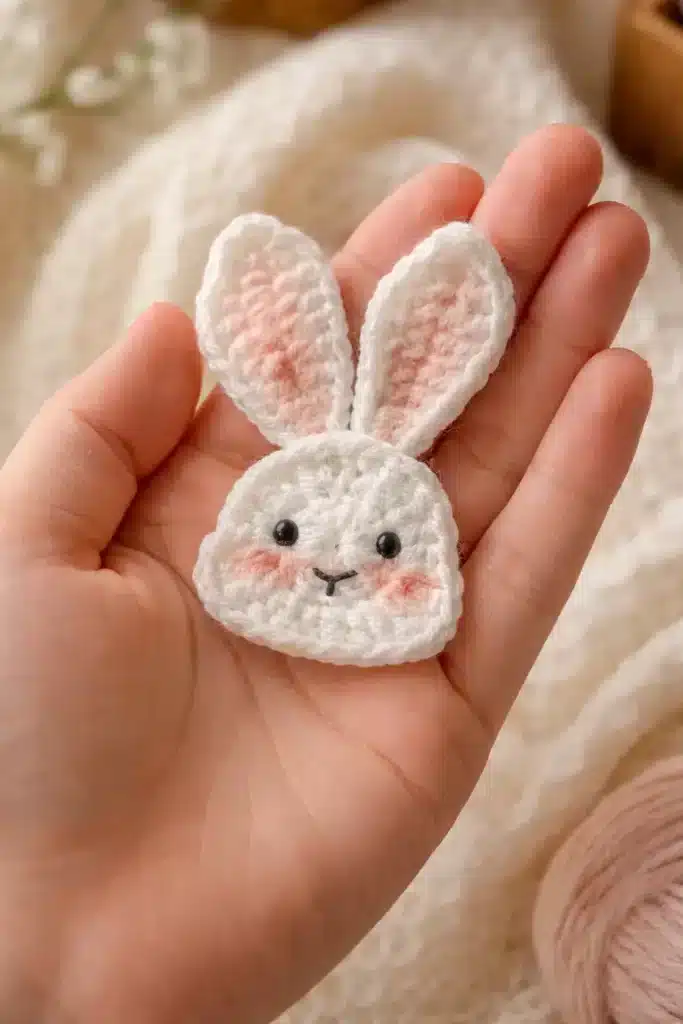
US terms are used for this pattern.
- MR = magic ring
- ch = chain
- sl st = slip stitch
- sc = single crochet
- hdc = half double crochet
- dc = double crochet
- tr = treble crochet
- inc = 2 stitches in the same stitch
If any stitch is new to you, these quick tutorials may help: chain stitch, single crochet, half double crochet, double crochet, and treble crochet. For an additional beginner-friendly stitch reference, you can also check the Crochet Guild of America basic crochet techniques guide. It covers core crochet basics like chain stitches, joining, and working into rings.
Pattern Notes
Before starting this flat bunny applique crochet pattern, keep these quick notes in mind:
- The head is worked in one round. Each ear is made separately, then sewn to the top of the head.
- You can make the face sleepy, smiling, or minimal depending on your style.
- For a softer decorative finish, use cotton yarn.
- For a fluffier bunny look, use a slightly fuzzy acrylic or plush-light yarn.
Pattern Instructions
Bunny Head
This shaping creates the rounded face and the soft cheek line that makes this flat bunny applique crochet pattern look so sweet.
Round 1: Make a magic ring and work 12 dc into the ring. Join. [12 sts]
Round 2: Work as follows around:
- 3 dc inc
- 1 hdc inc
- 3 tr in next stitch
- (dc, hdc) in next stitch
- 1 hdc inc
- (hdc, dc) in next stitch
- 3 tr in next stitch
- 1 hdc inc
- 2 dc inc
Fasten off.
Bunny Ear
Make 2.
Ch 12.
Starting in the 2nd chain from hook, work:
- sl st
- sc
- 2 hdc
- 2 dc
- 2 tr
- dc
- hdc
In the last chain work: (sc, ch 2, sc).
Now continue on the other side of the foundation chain:
- hdc
- dc
- 2 tr
- 2 dc
- 2 hdc
- sc
- sl st
Fasten off, leaving a tail for sewing.
Assembly
To finish your flat bunny applique crochet pattern:
- Make 2 ears.
- Sew them neatly to the top of the head.
- Add light pink yarn or blush yarn inside the ears.
- Embroider the eyes and mouth with black thread.
- Add soft pink blush on the cheeks for the same cute look.
Take your time during assembly, because the placement of the ears and face is what gives this flat bunny applique crochet pattern its final personality.
Tips
Here are a few easy tips to make your flat bunny applique crochet pattern look extra polished:
- Do not over-tighten the magic ring.
- Block the ears lightly if they curl too much.
- Use a fine needle for face embroidery.
- Keep the eyes small and evenly spaced.
- Sew the ears slightly angled outward for a softer, cuter expression.
If you want to turn your bunny into a spring-themed gift set, it pairs beautifully with floral accents like this Crochet Cosmos Flower Bouquet Pattern.
FAQs
Is this flat bunny applique crochet pattern beginner-friendly?
Yes, this flat bunny applique crochet pattern is suitable for confident beginners, especially if you already know basic stitches like chain, single crochet, half double crochet, double crochet, and treble crochet.
Can I use this flat bunny applique crochet pattern on clothing?
Yes. This bunny motif can be sewn onto sweaters, baby dresses, hats, and bags. Just make sure the sewing is secure.
What yarn works best for this flat bunny applique crochet pattern?
Cotton yarn is excellent if you want crisp stitch definition. Soft acrylic works well if you want a softer decorative finish.
Can I make this flat bunny applique crochet pattern bigger?
Yes. You can make it larger simply by using thicker yarn and a bigger hook.
What are some good uses for this motif?
One of my favorite things about this flat bunny applique crochet pattern is how versatile it is. You can use it for baby blankets, spring garlands, Easter baskets, children’s clothing, crochet hair clips, tote bags, and handmade greeting cards.
Pin This Crochet Pattern!